SPG was a 12 week long project, completed in the Fall semester of my Senior year at JMU for a Parametric Upcycling Design class. The design brief being to create a household object using our semester long research and exploration into waste material as well as parametric design.
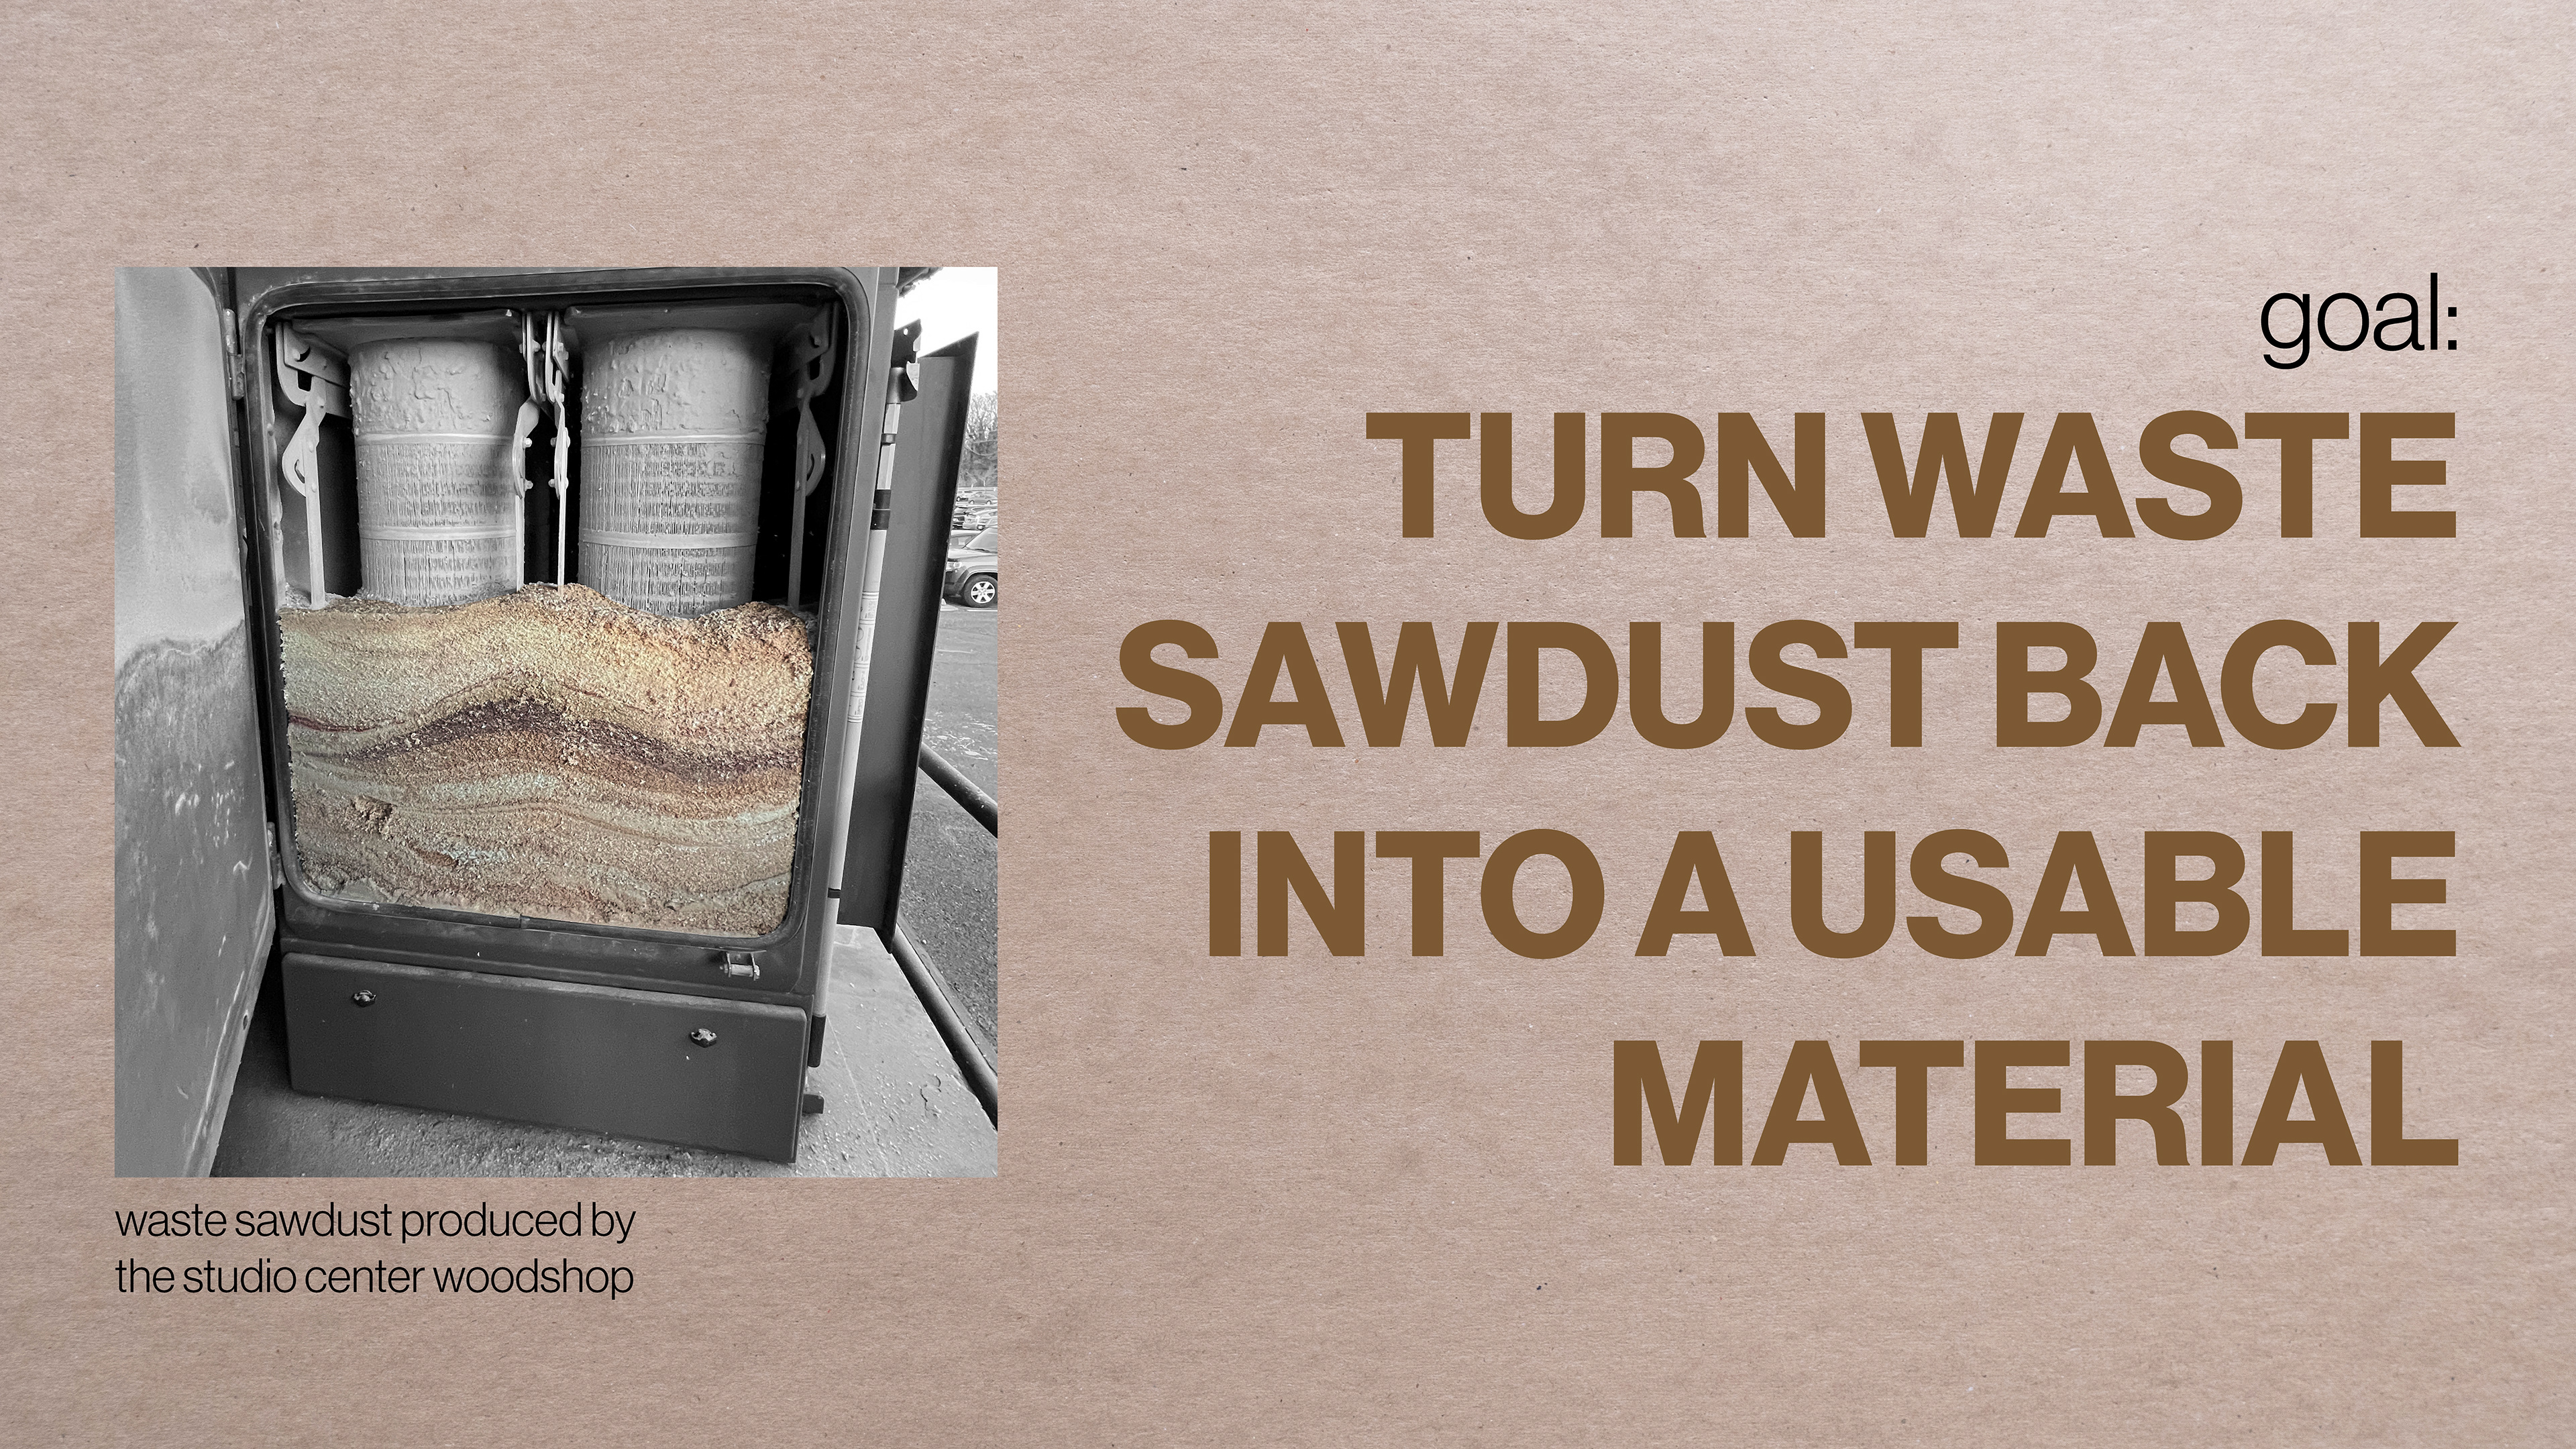
My goal for this project was to attack waste on not only a local level, but find ways to repurpose waste that I, personally, create all the time: sawdust. Every week at the JMU Studio Center, numerous large trash bags are filled with the sawdust produced by students, and then thrown into the garbage. I wanted to explore ways we can turn that waste sawdust into a usable material again.
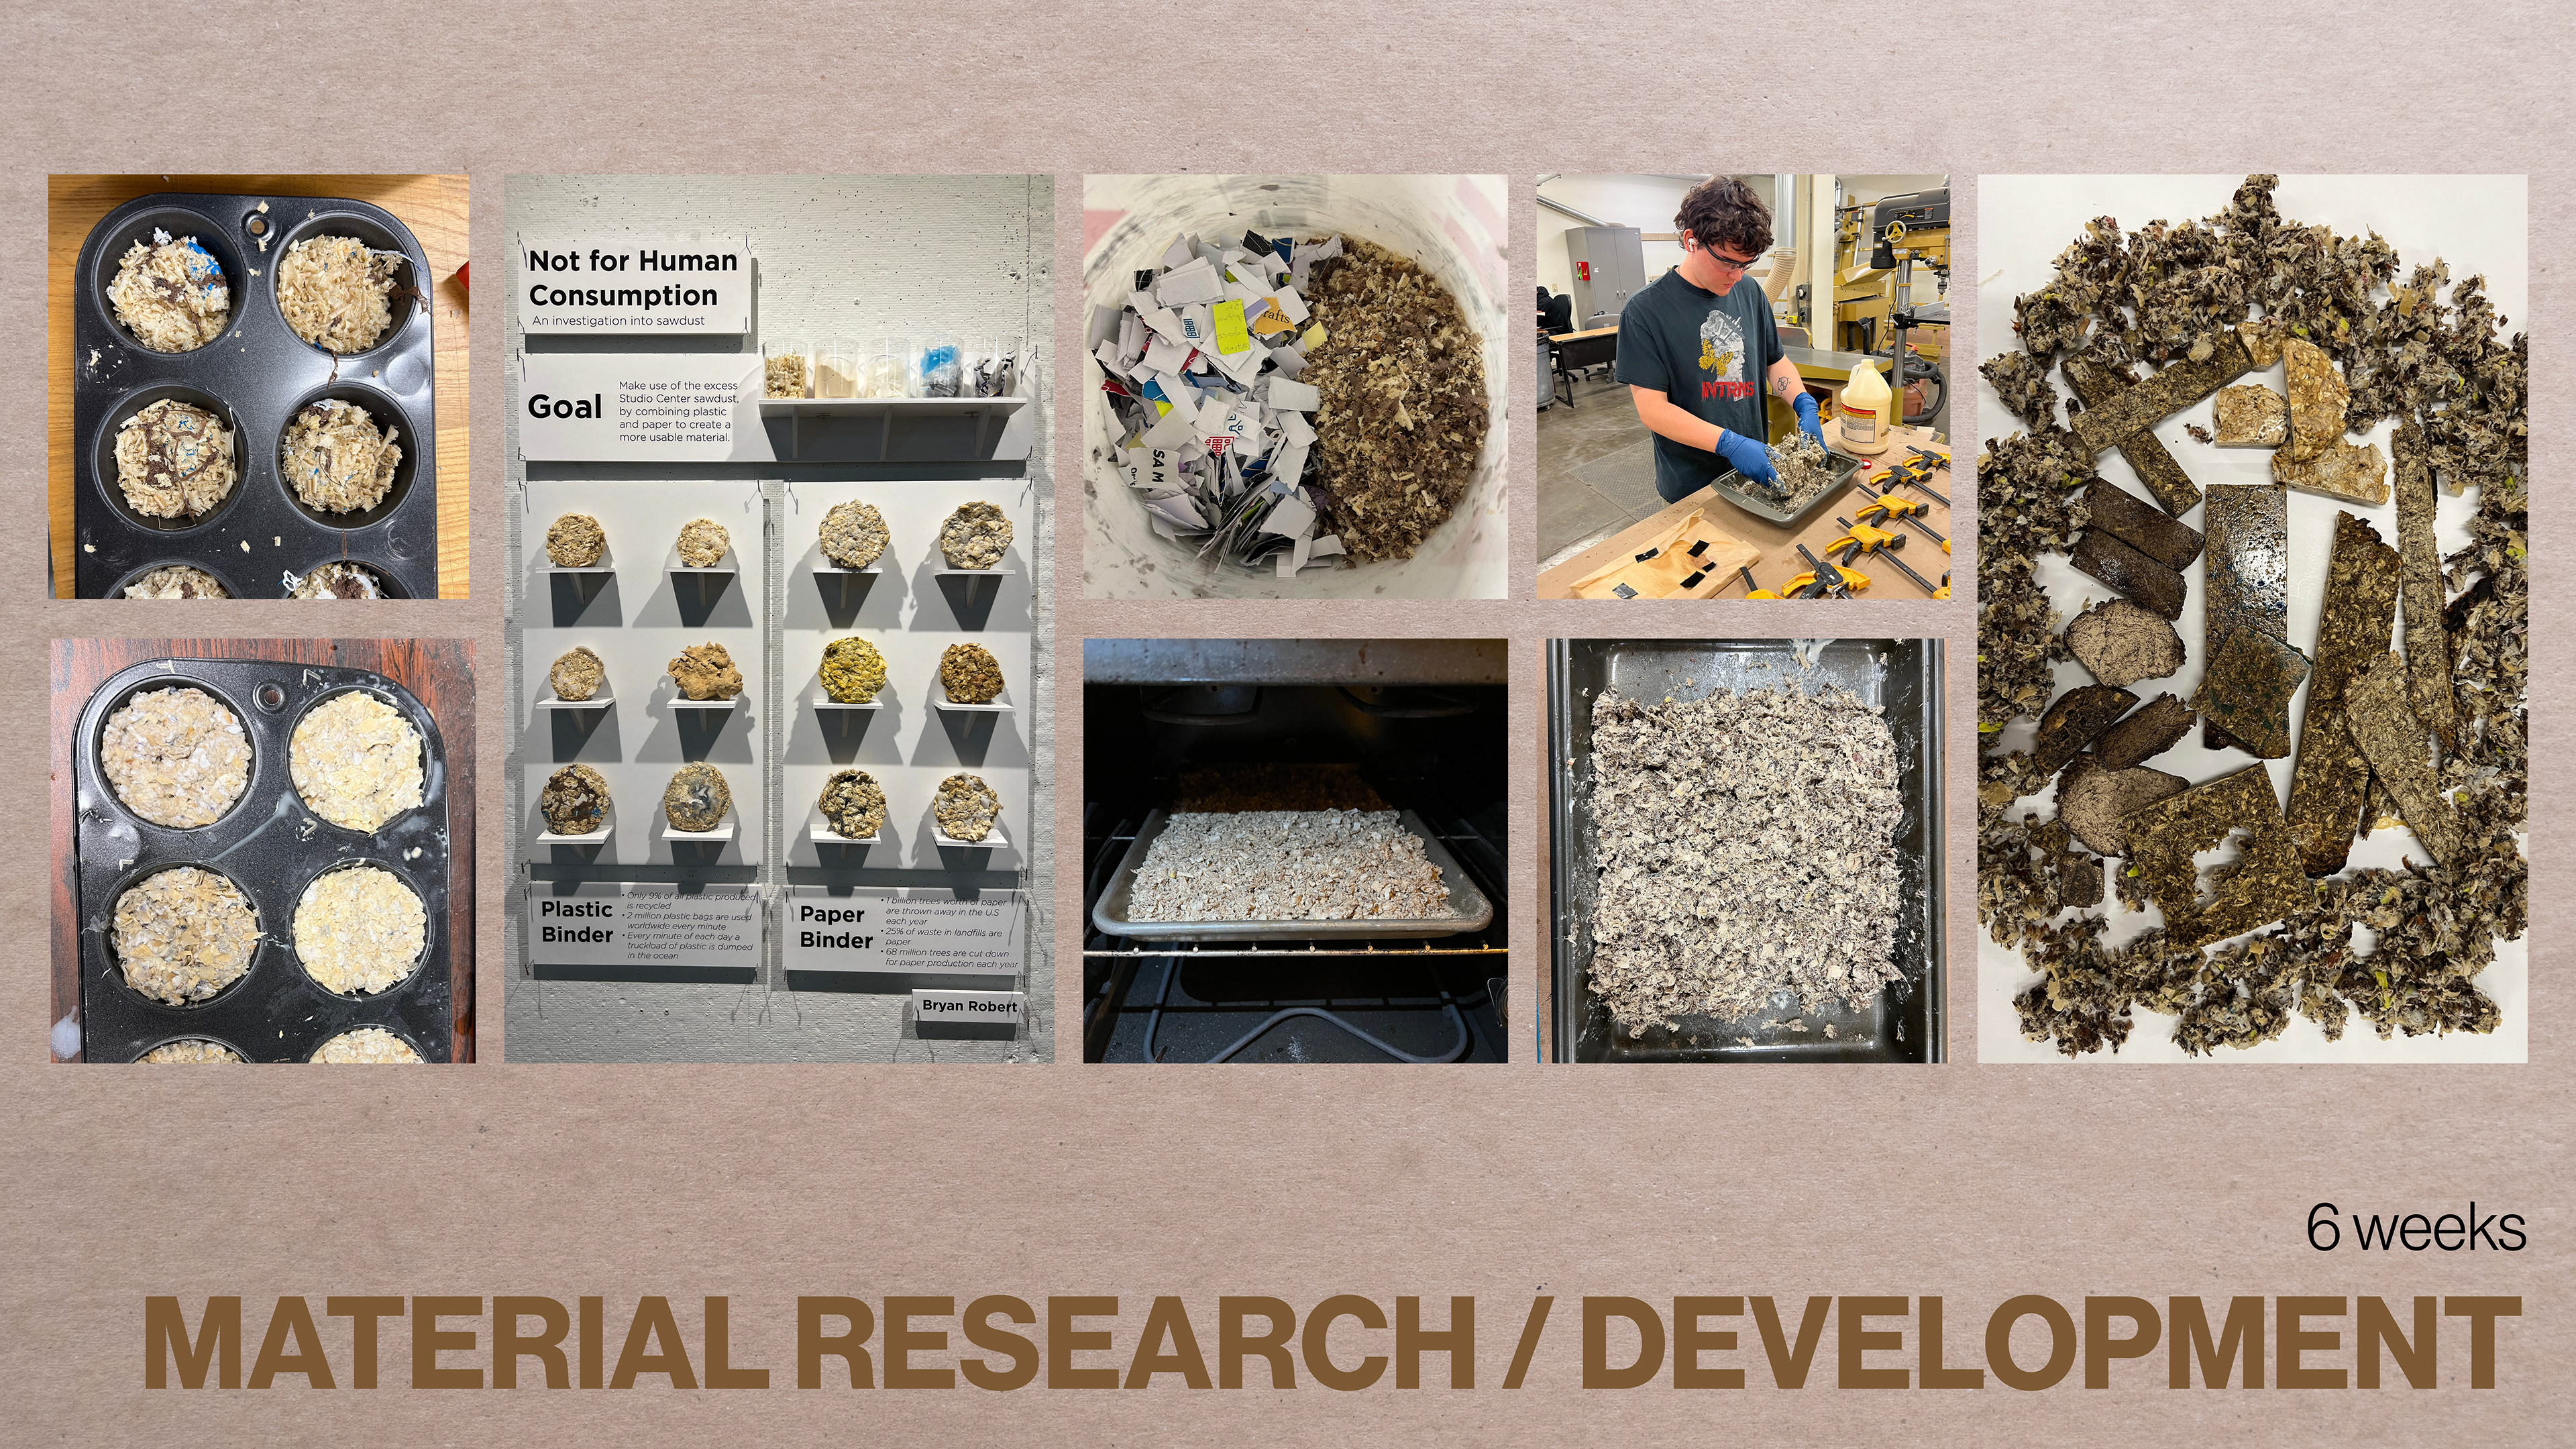
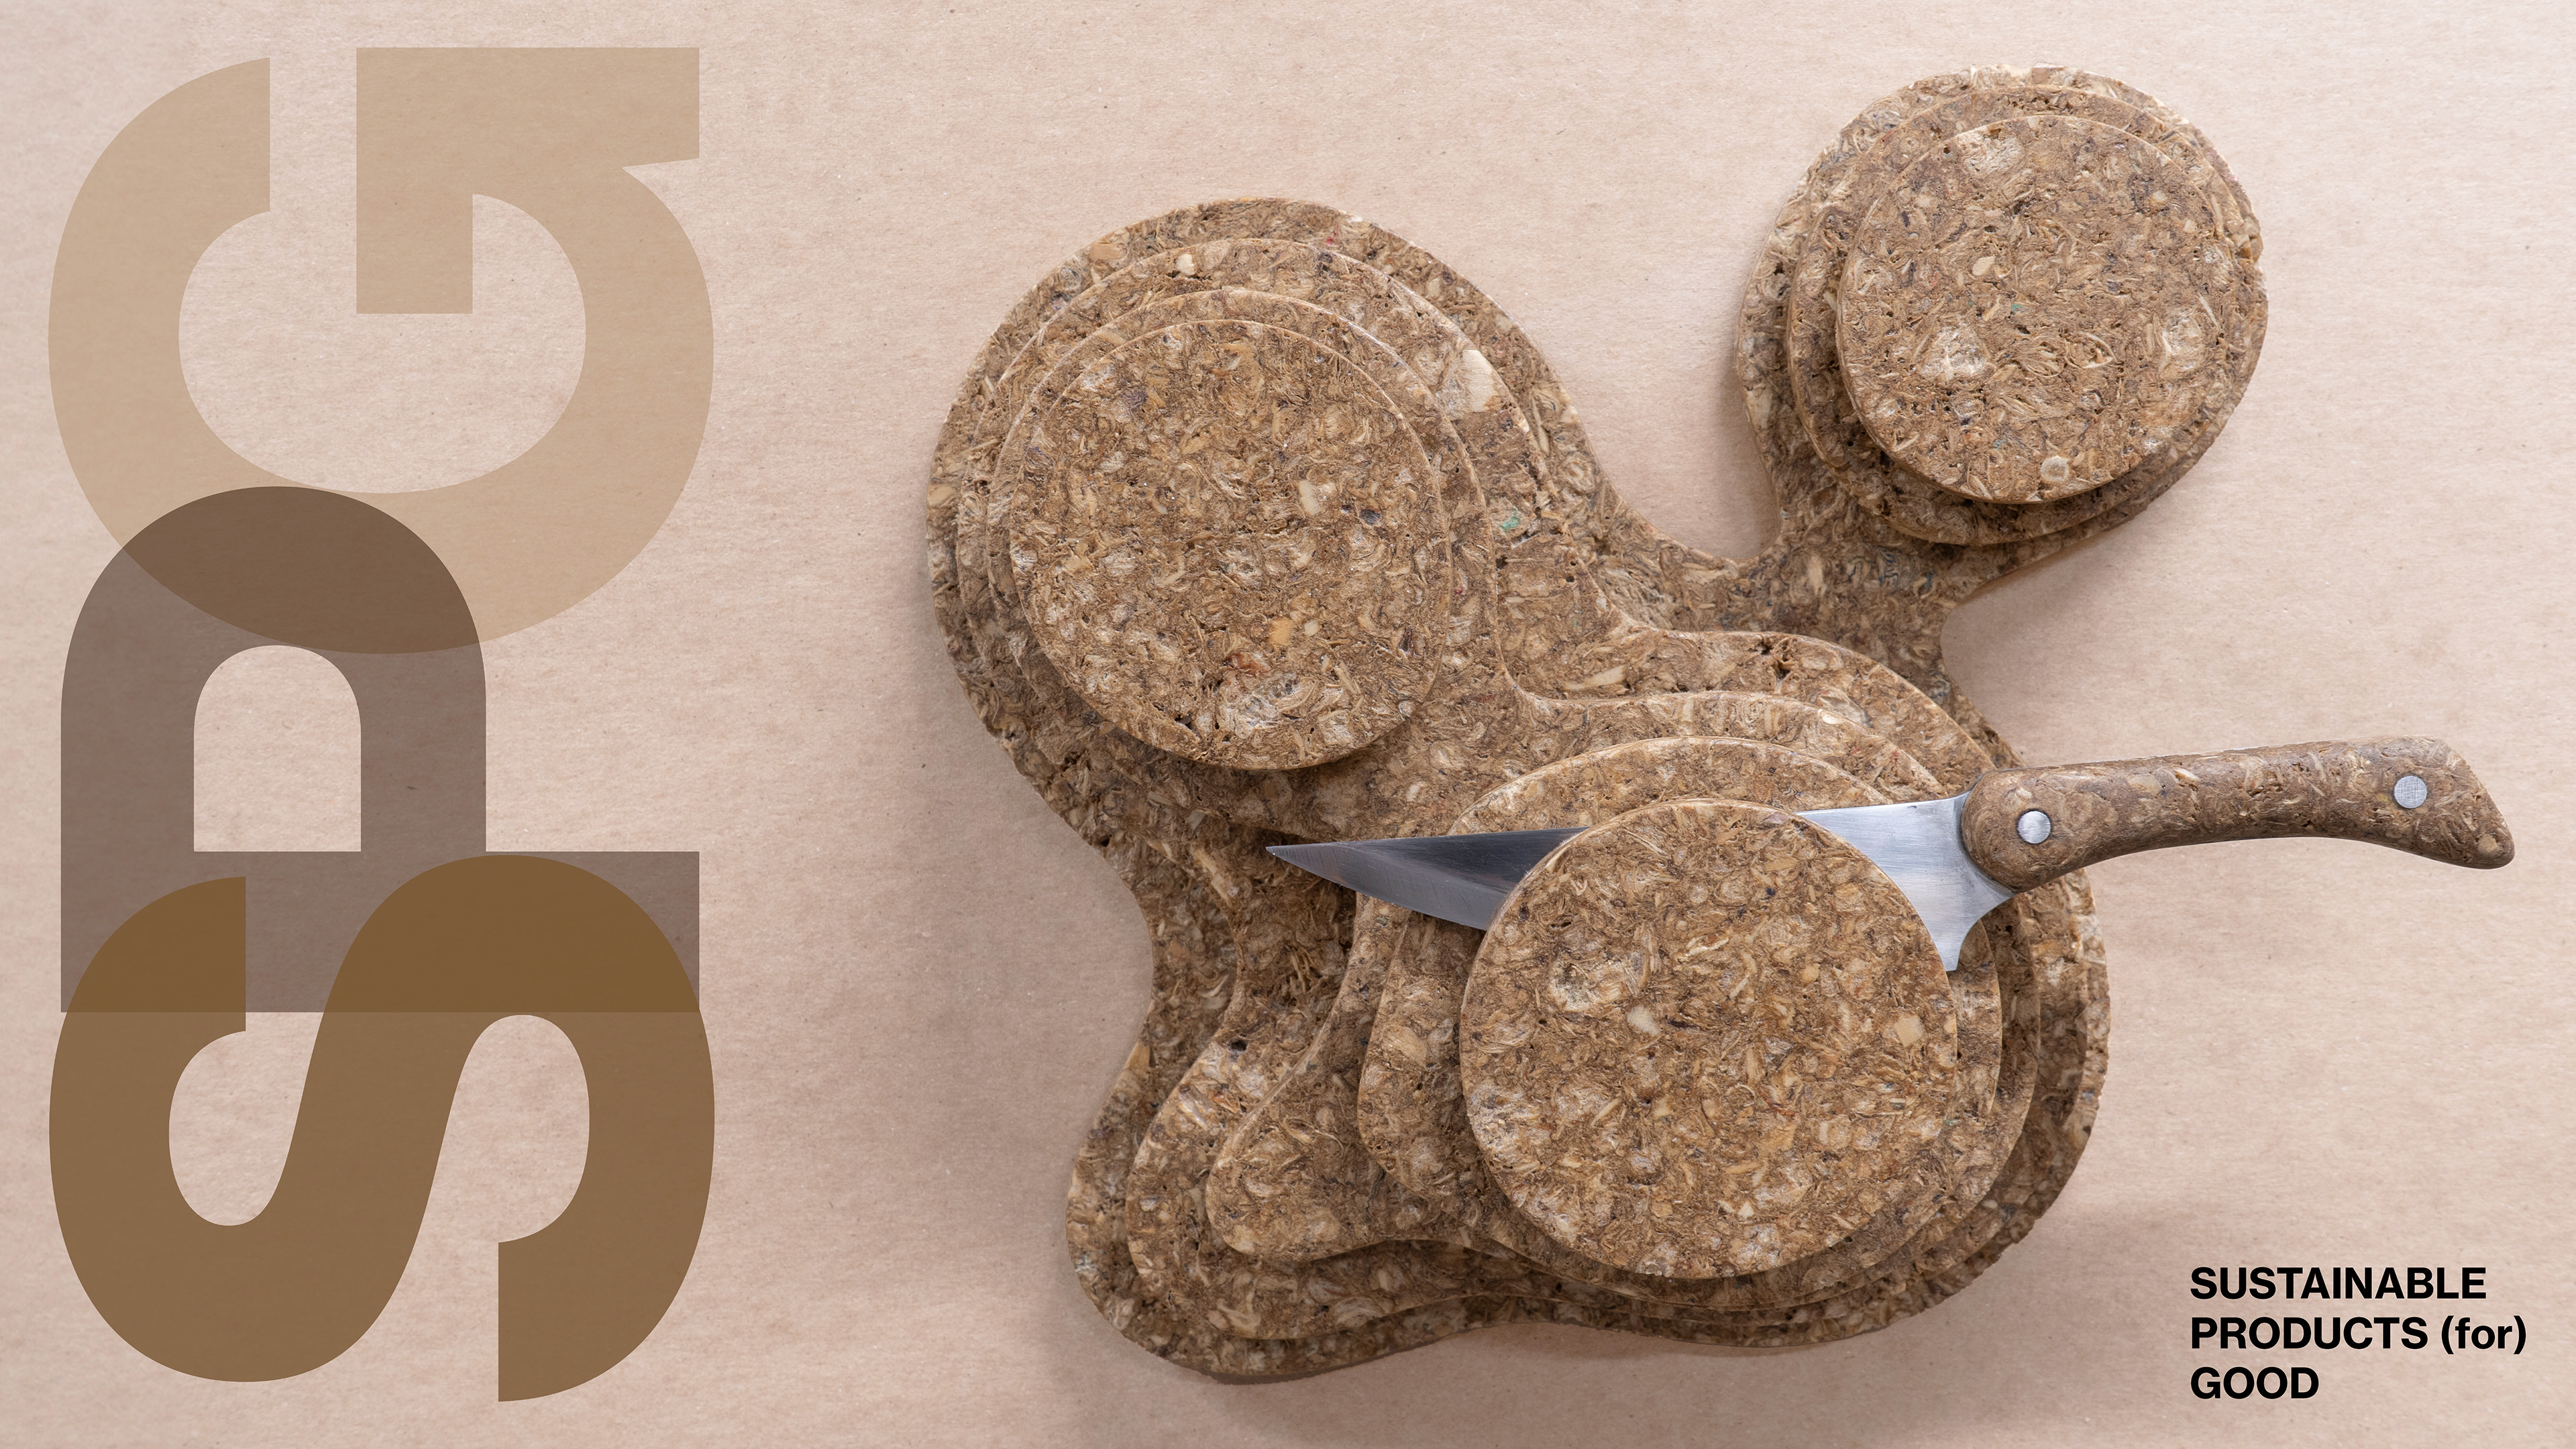
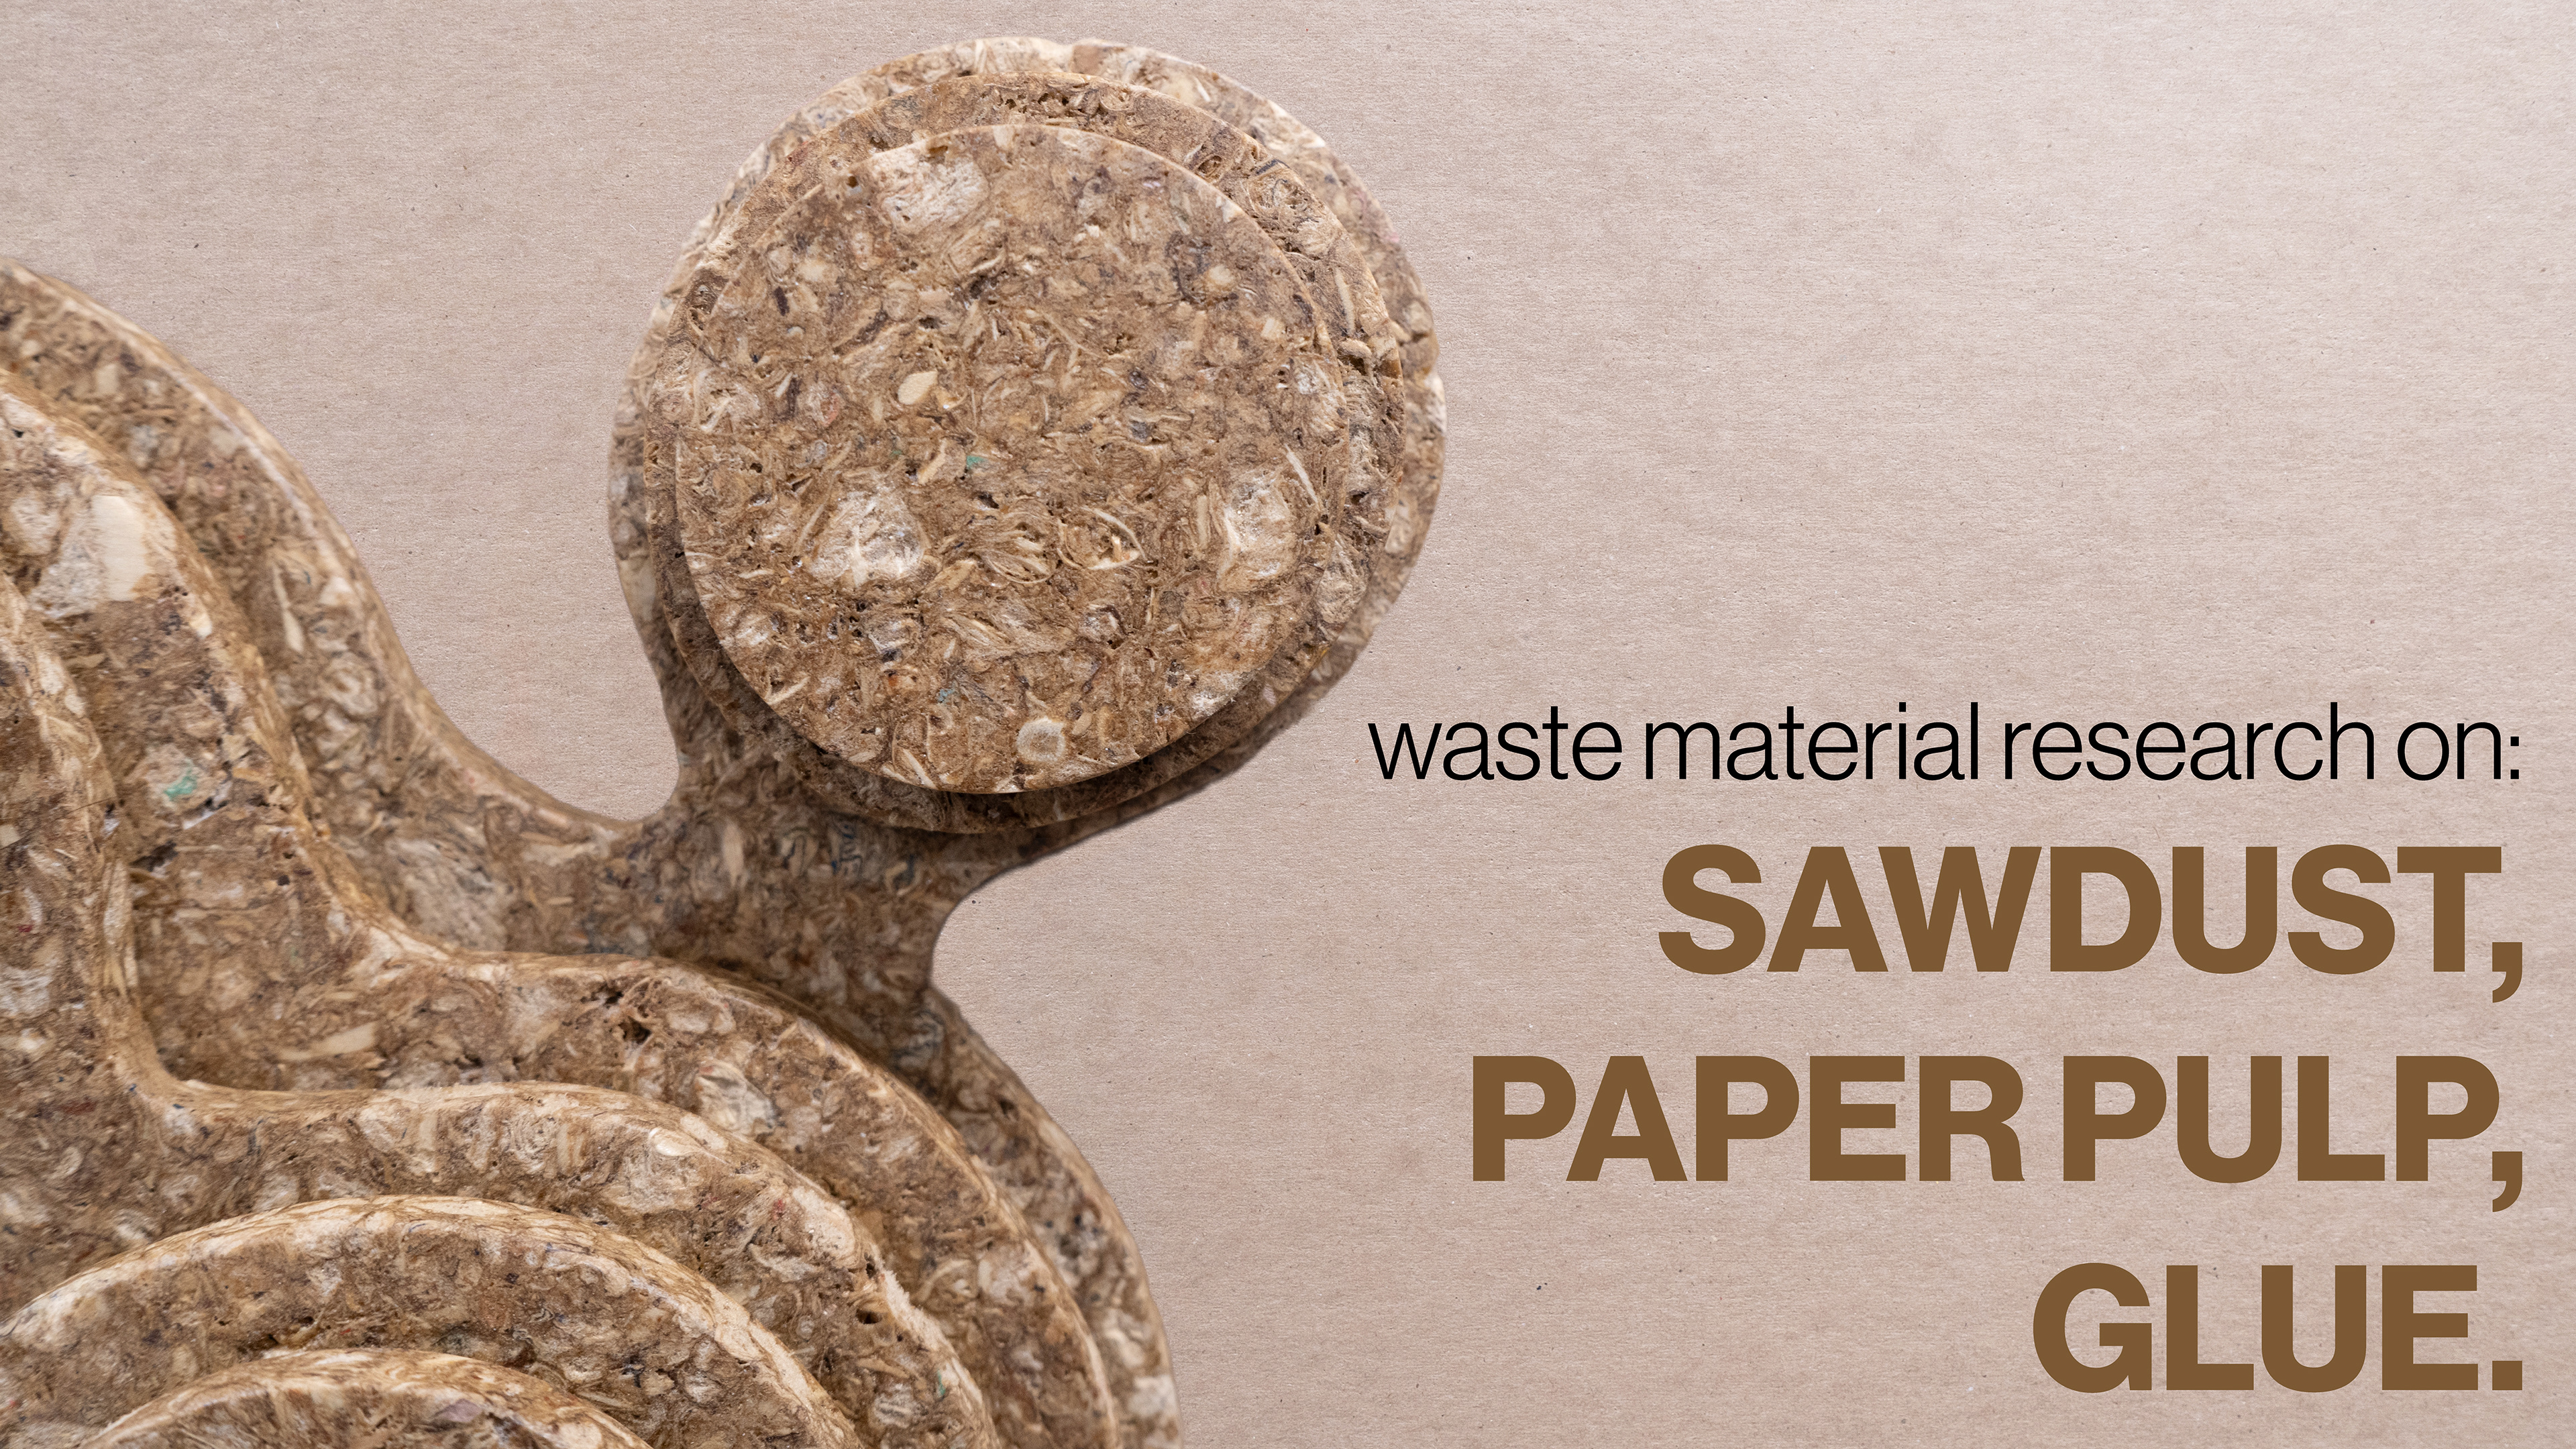
The first 6 weeks of this project were all about researching and exploring different ways that sawdust could become usable again. This started with combining the sawdust with different binders such as plastic, paper, and glue. The best and most usable material I came up with from these experiments included a mixture of recycled paper (also from the Studio Center) as well as a non-toxic glue. When combined with the sawdust, pulped together in water, dried, mixed with the glue, and then pressed into a mold; the outcome was a hard composite like material. This became known as SPG, or Sawdust, Paper Pulp, and Glue. I also did tests on how this material decomposes. By breaking down the solid material into smaller pieces, and then soaking them in water, SPG is able to be broken down further and composted as its original form; sawdust and paper.
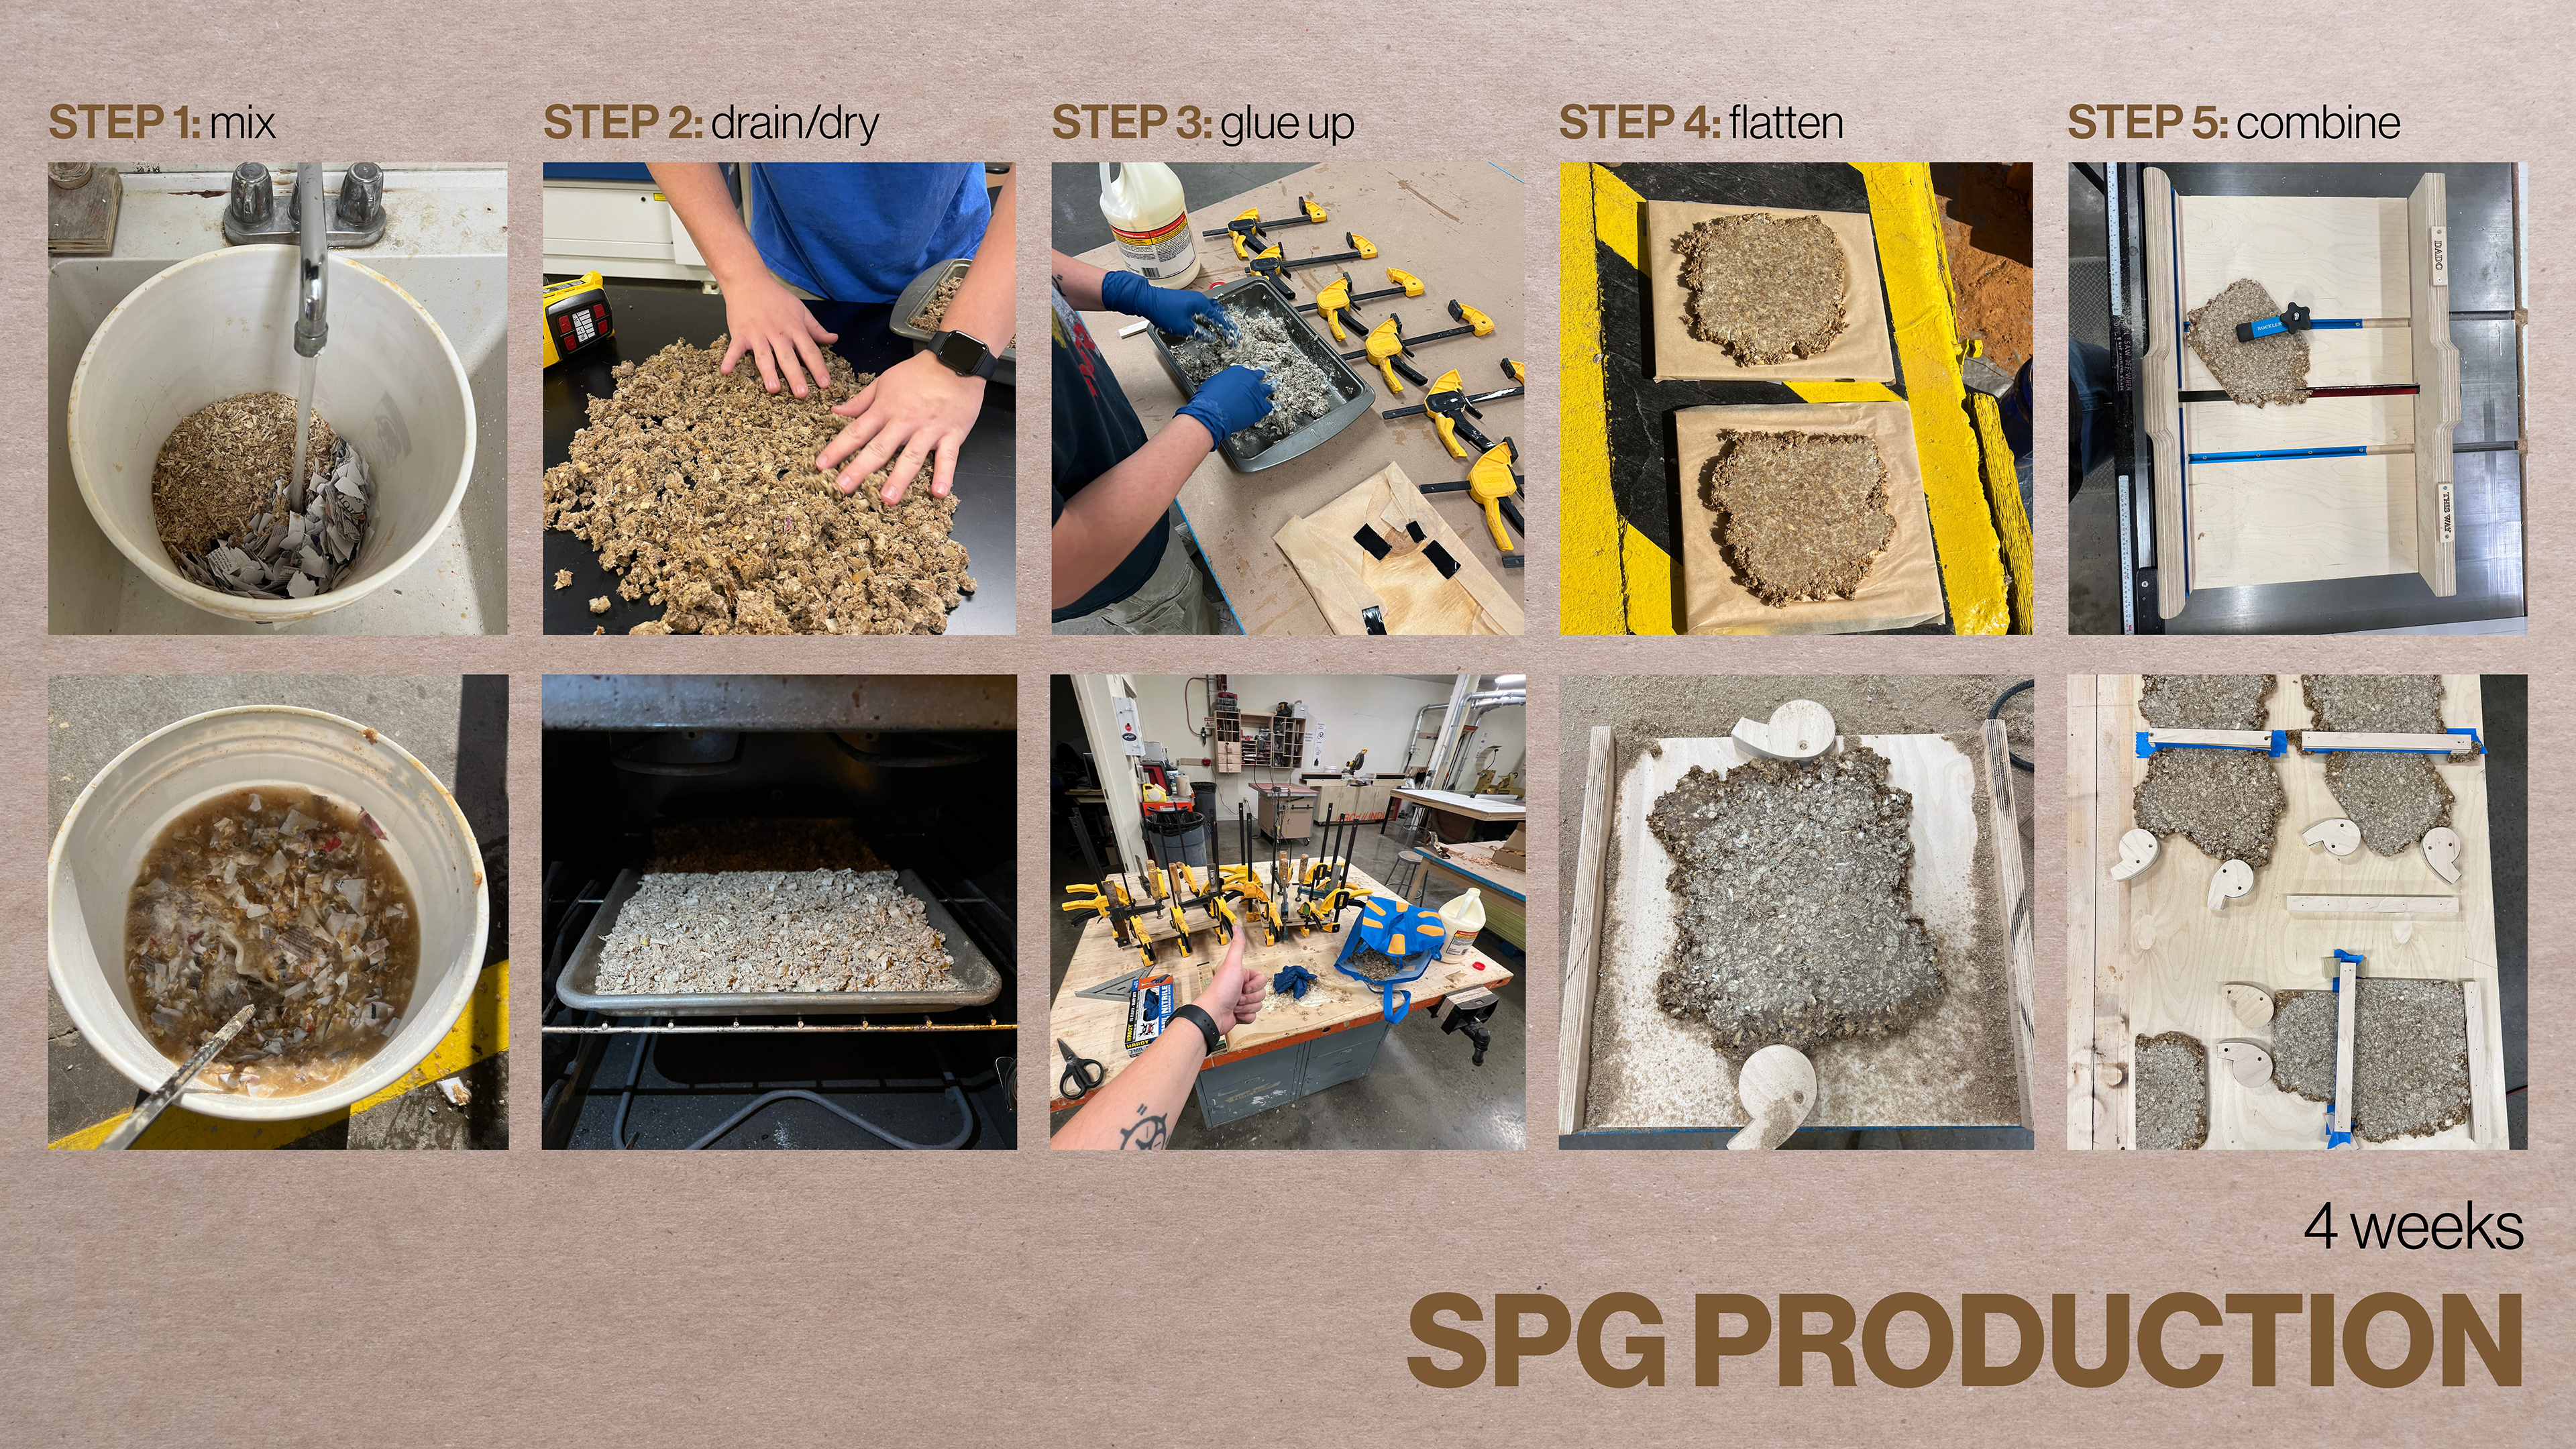
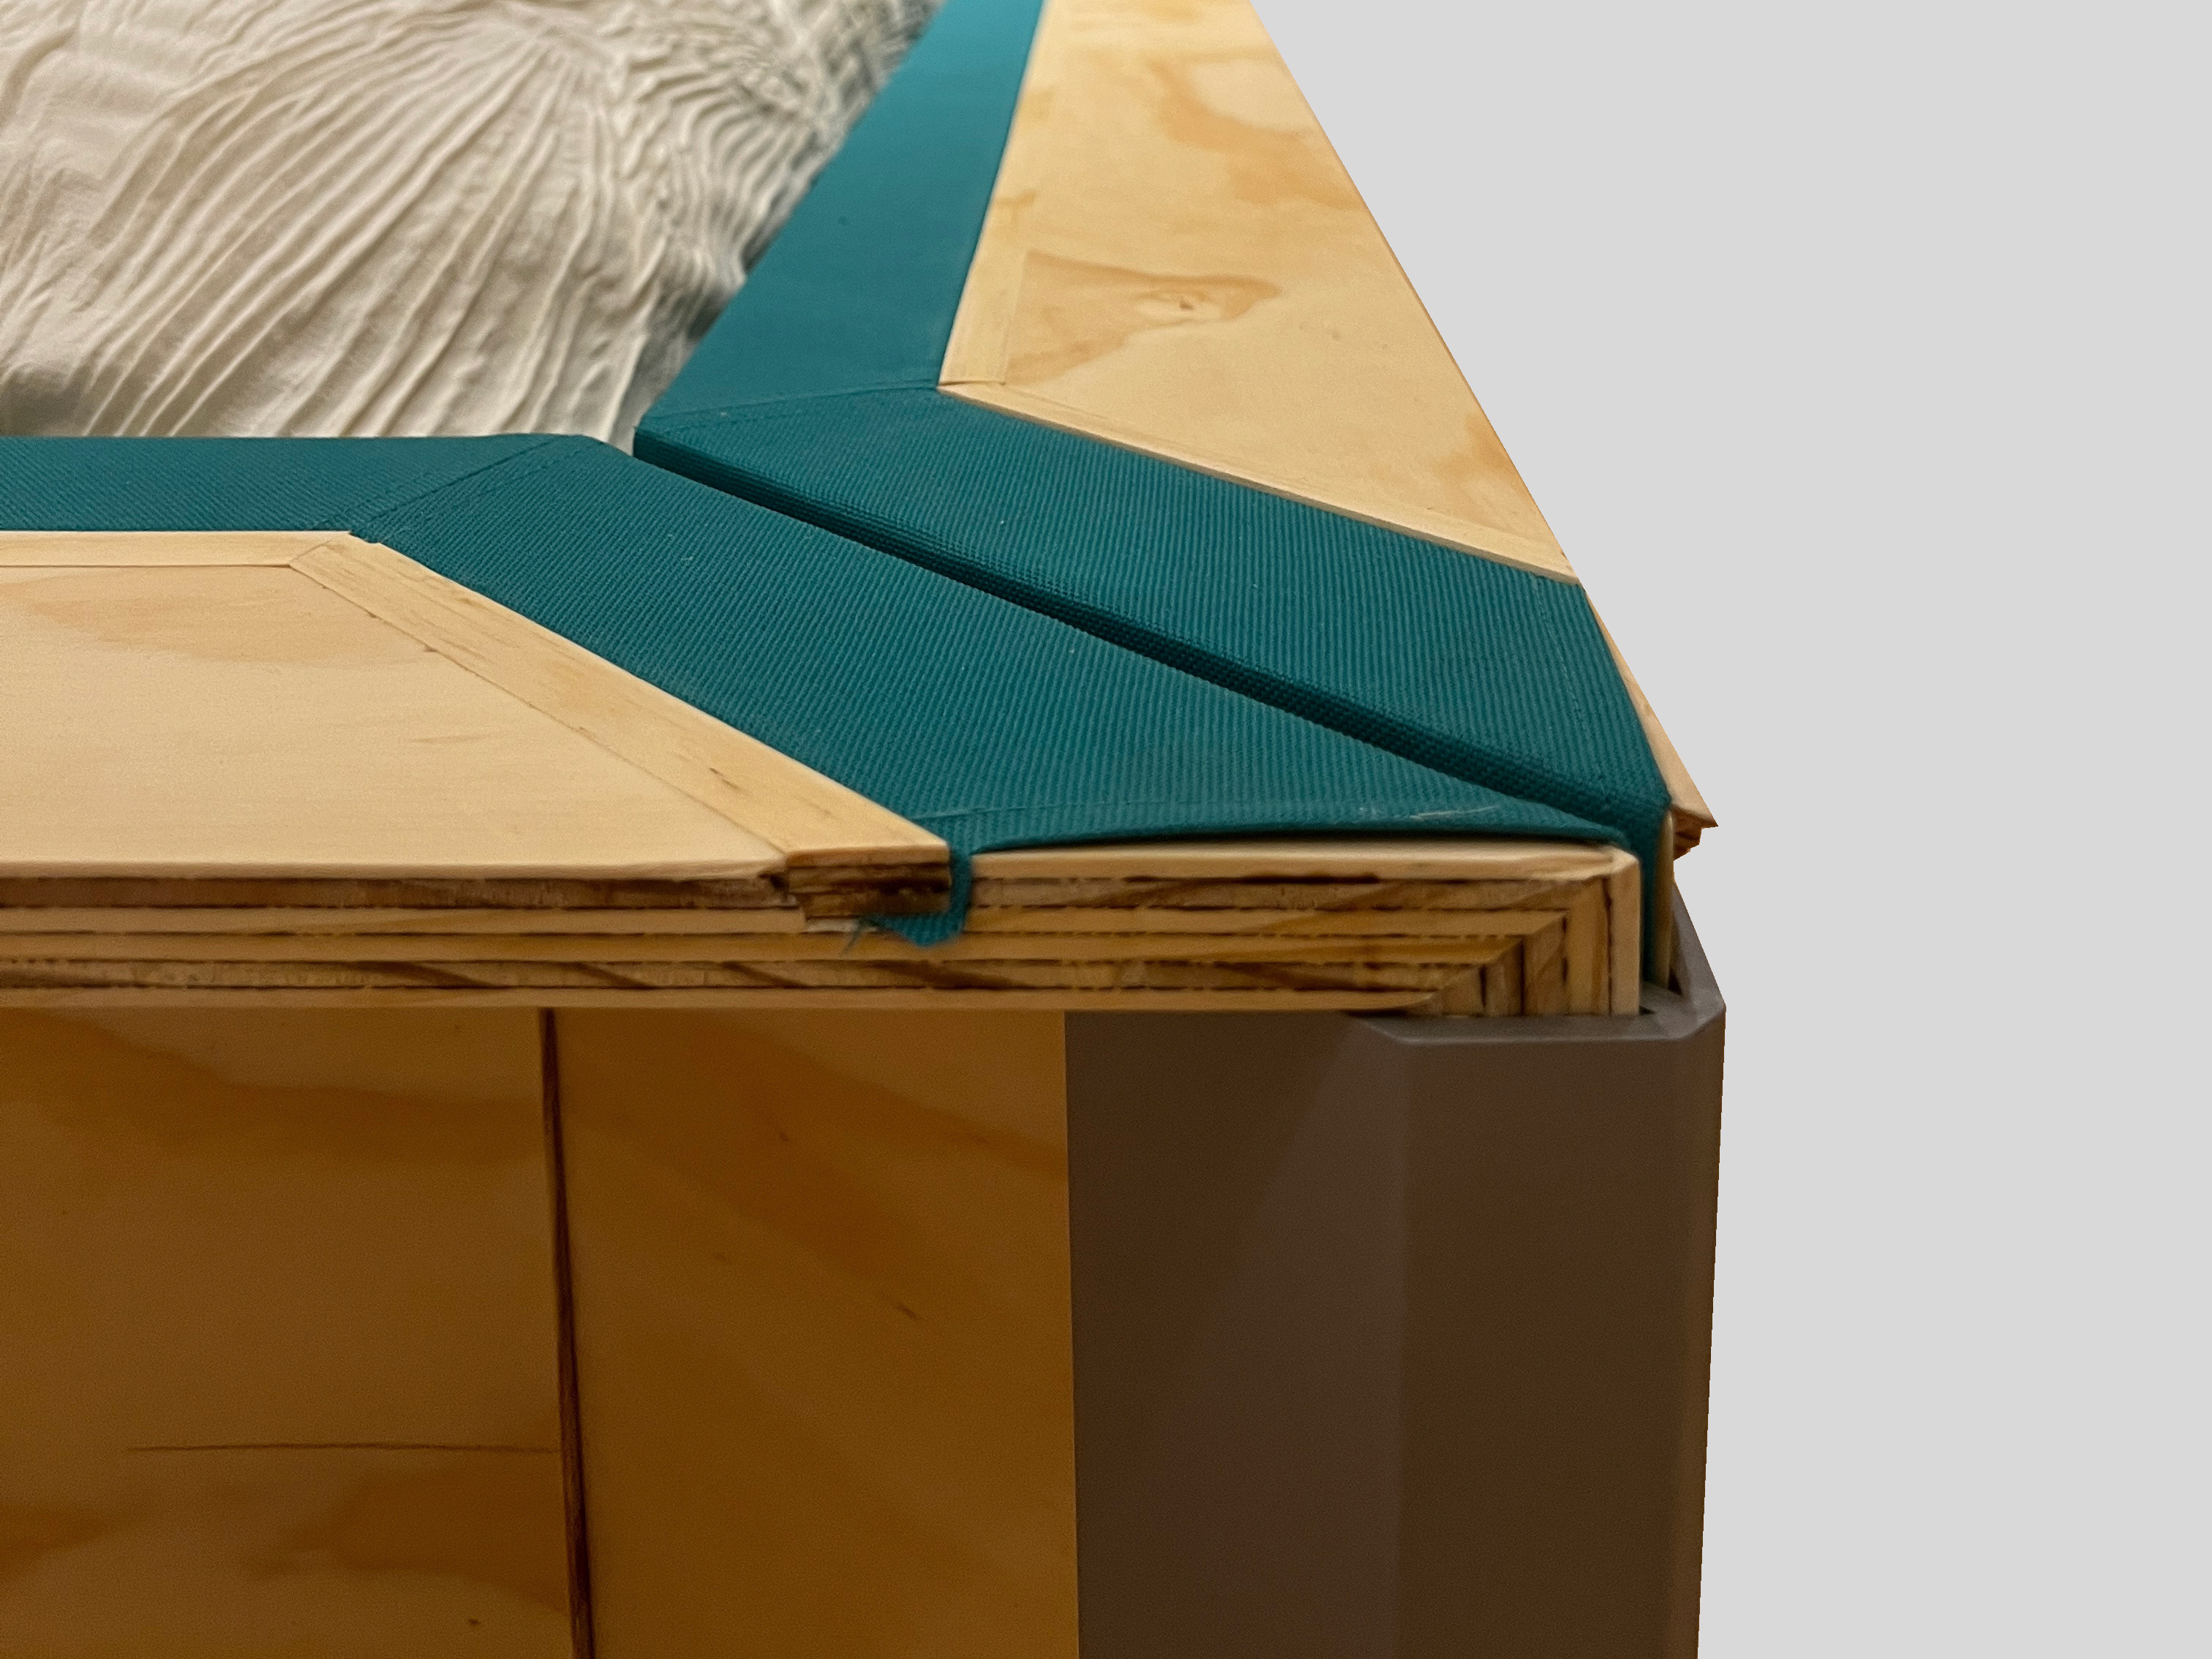
After I cracked the code on the recipe for SPG, the next 4 weeks were spent repeating the making process over and over until I had enough material to make a product out of it. A very important step in the process that came in the later weeks of the production was the flattening of the SPG sheets. Out of the molds, SPG has a rough and uneven surface, much like that of rough sawn lumber. To combat this, I made flattening jigs and clamps in order to flatten the sheets with a hand router. Since the sheets also didn't have any flat sides, I also had to get creative on how to cut, and eventually glue the sheets together to make them larger.
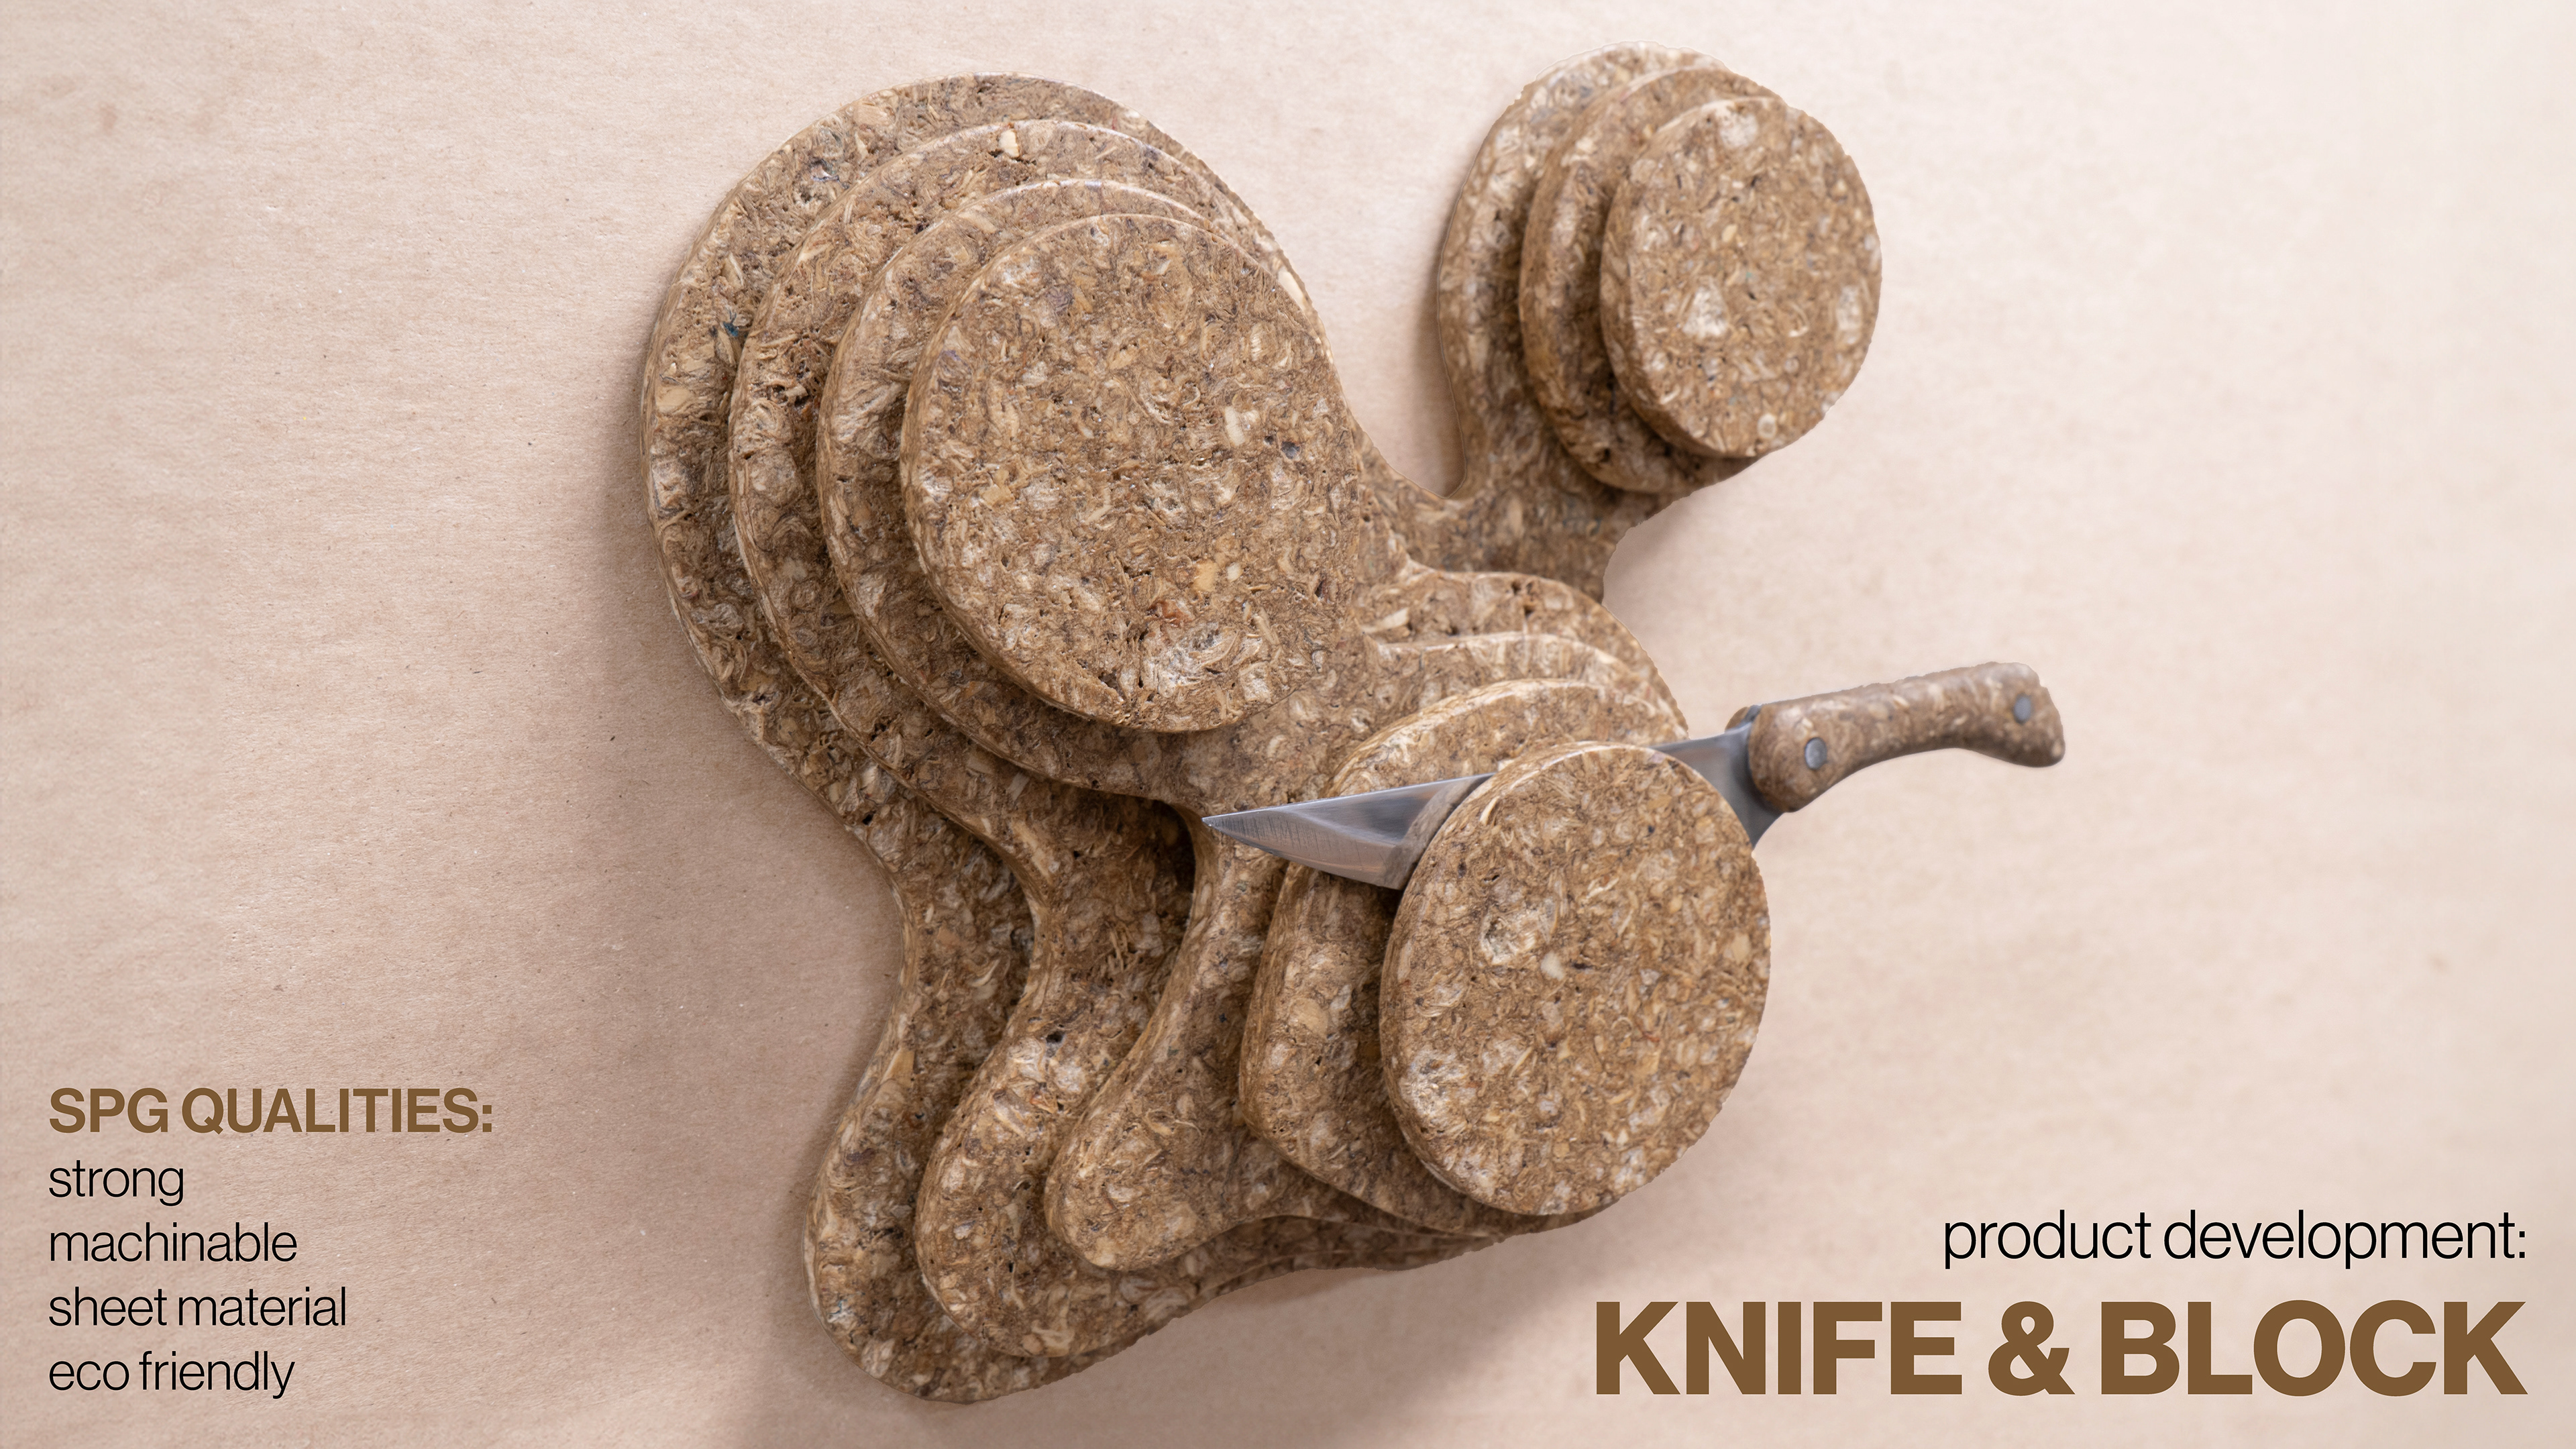
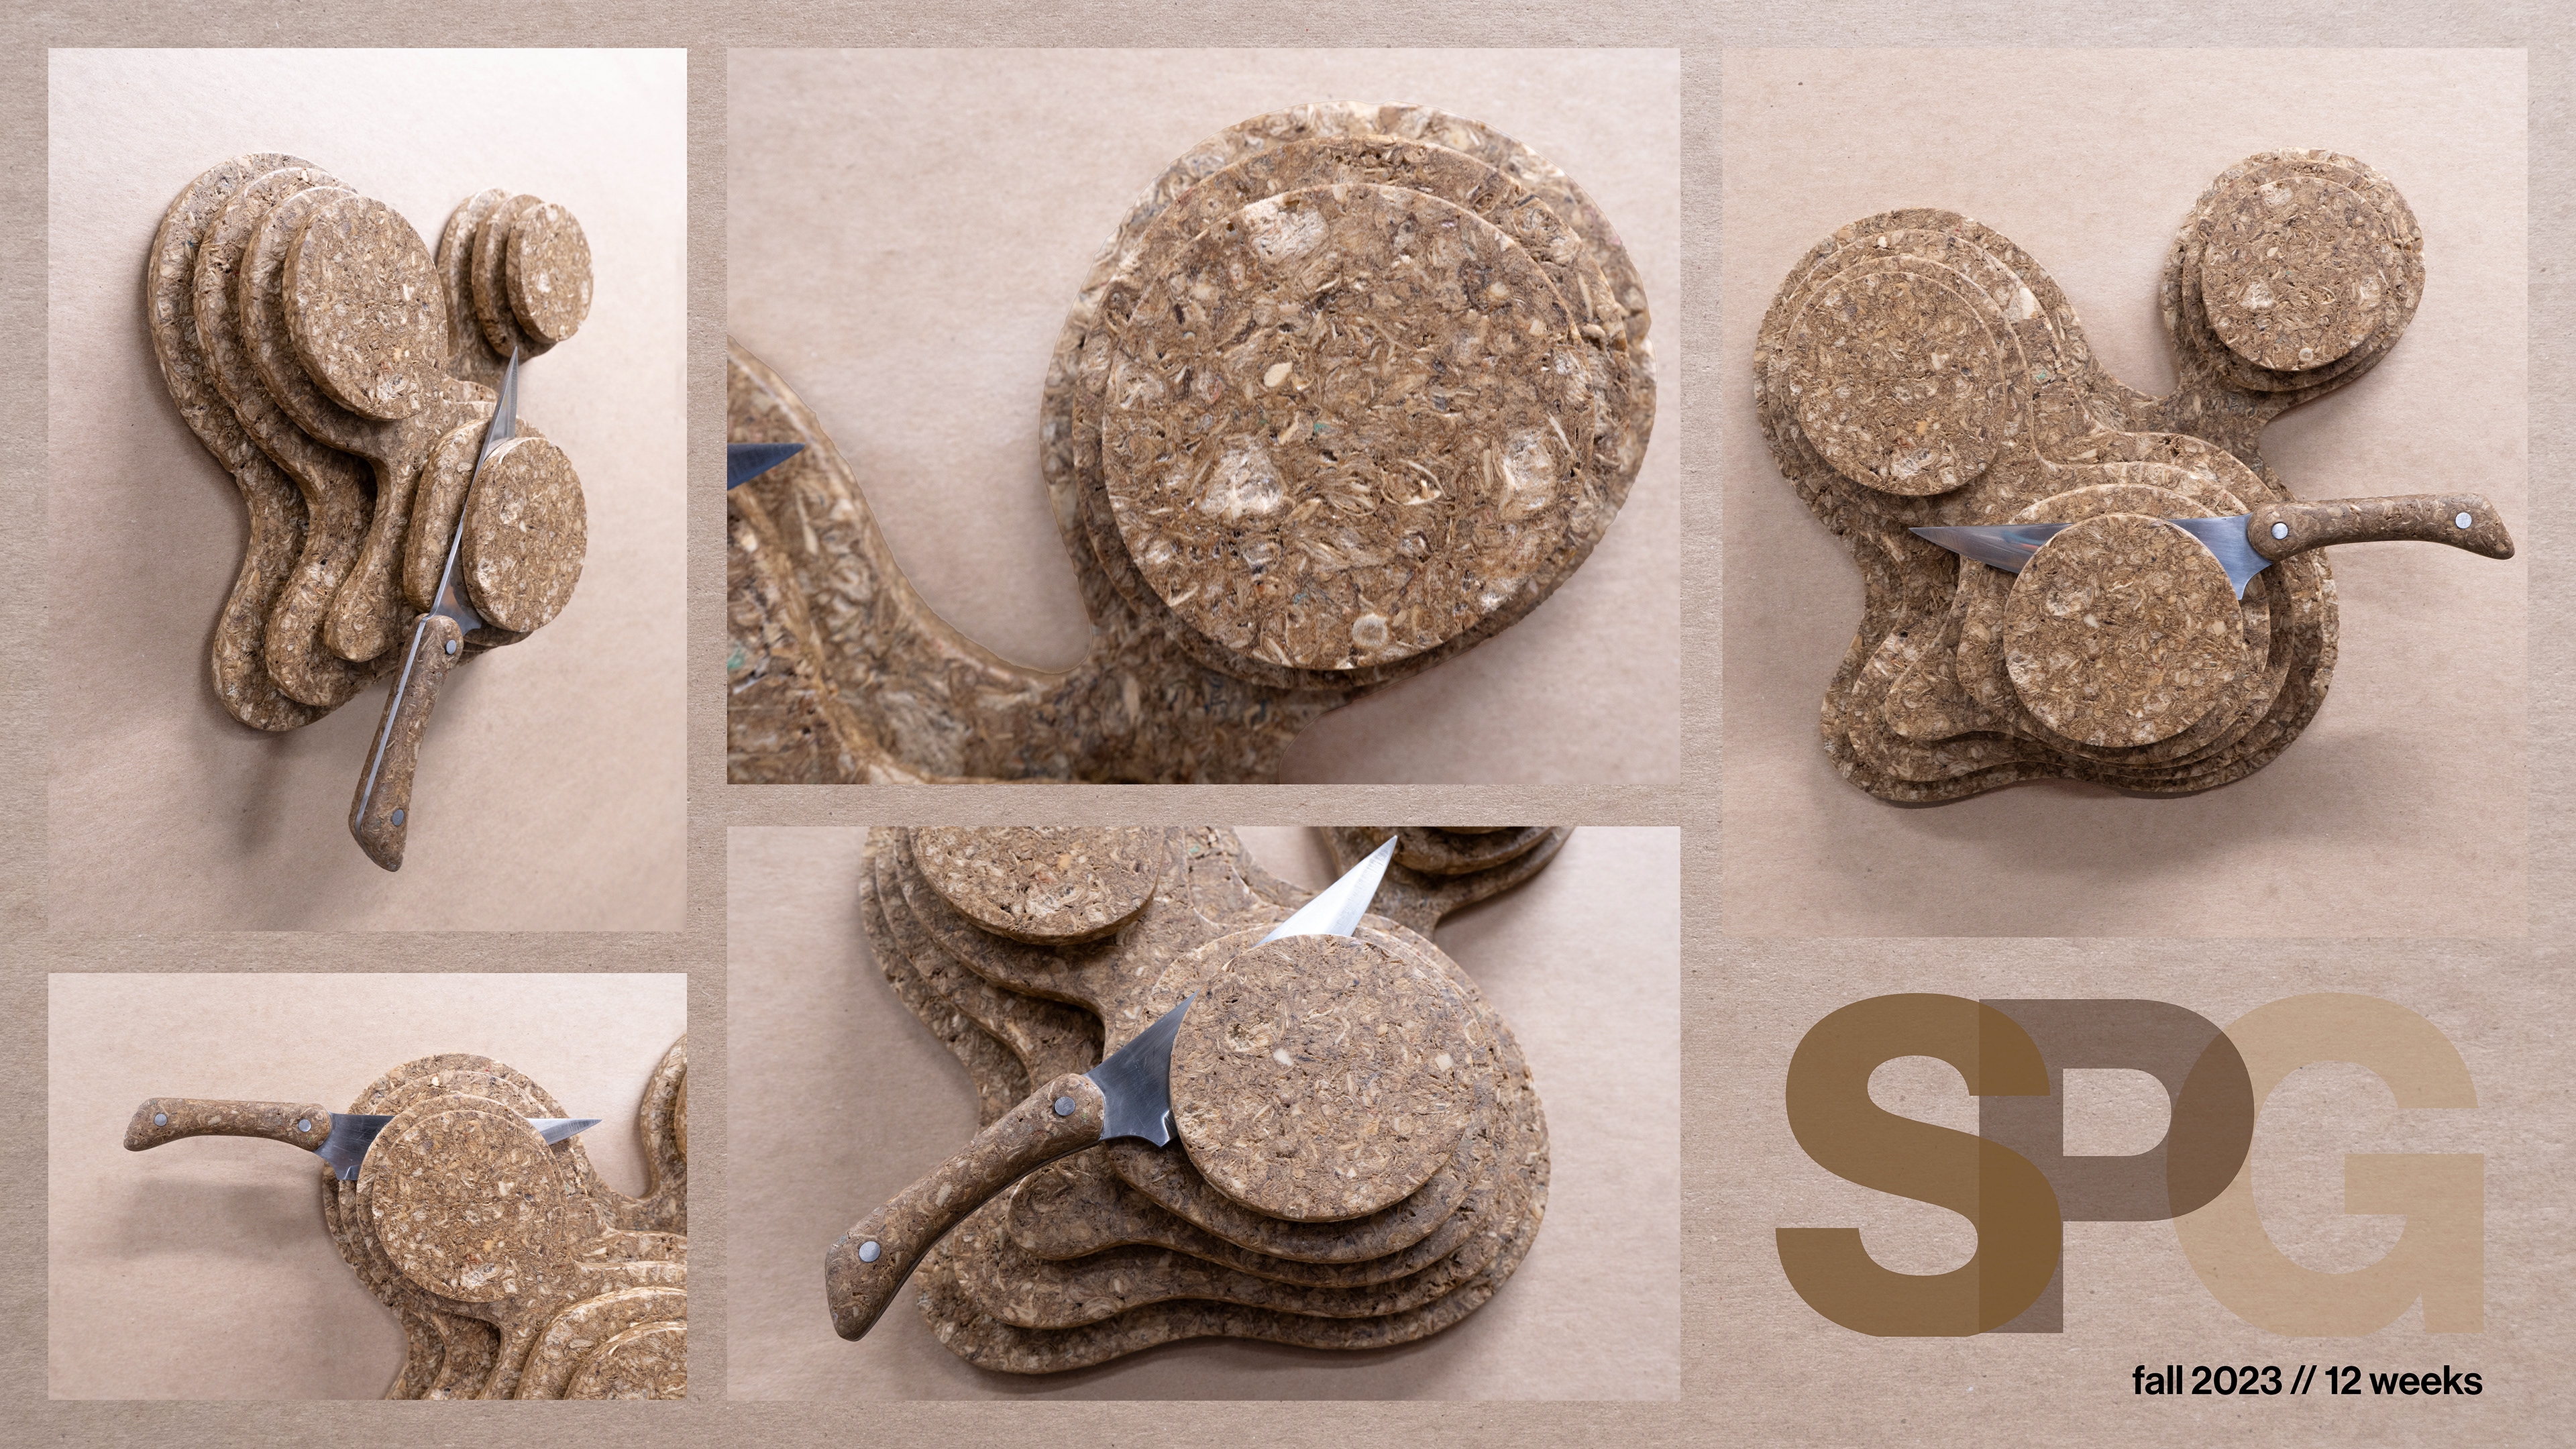
During all of the research and making phase of the material, I was also expanding my skills in Grasshopper, a parametric design software within the CAD program, Rhino. I began making lots of patterns and shapes, inspired by nature as well as by the patterns I was seeing within the material of SPG when it was machined. The swirls and visual textures produced by the paper and sawdust reminded me of Damascus steel, and the patterns it makes. This gave me the idea to create a knife as well as a knife block. I then took my parametrically designed patterns and extruded them into three dimensional forms; this became the basis for my knife block. Although I landed on this product for SPG, since it has similar qualities as a sheet material like OSB or MDF, as well as its strong and durable characteristics, SPG can be used to make an infinite amount of things.
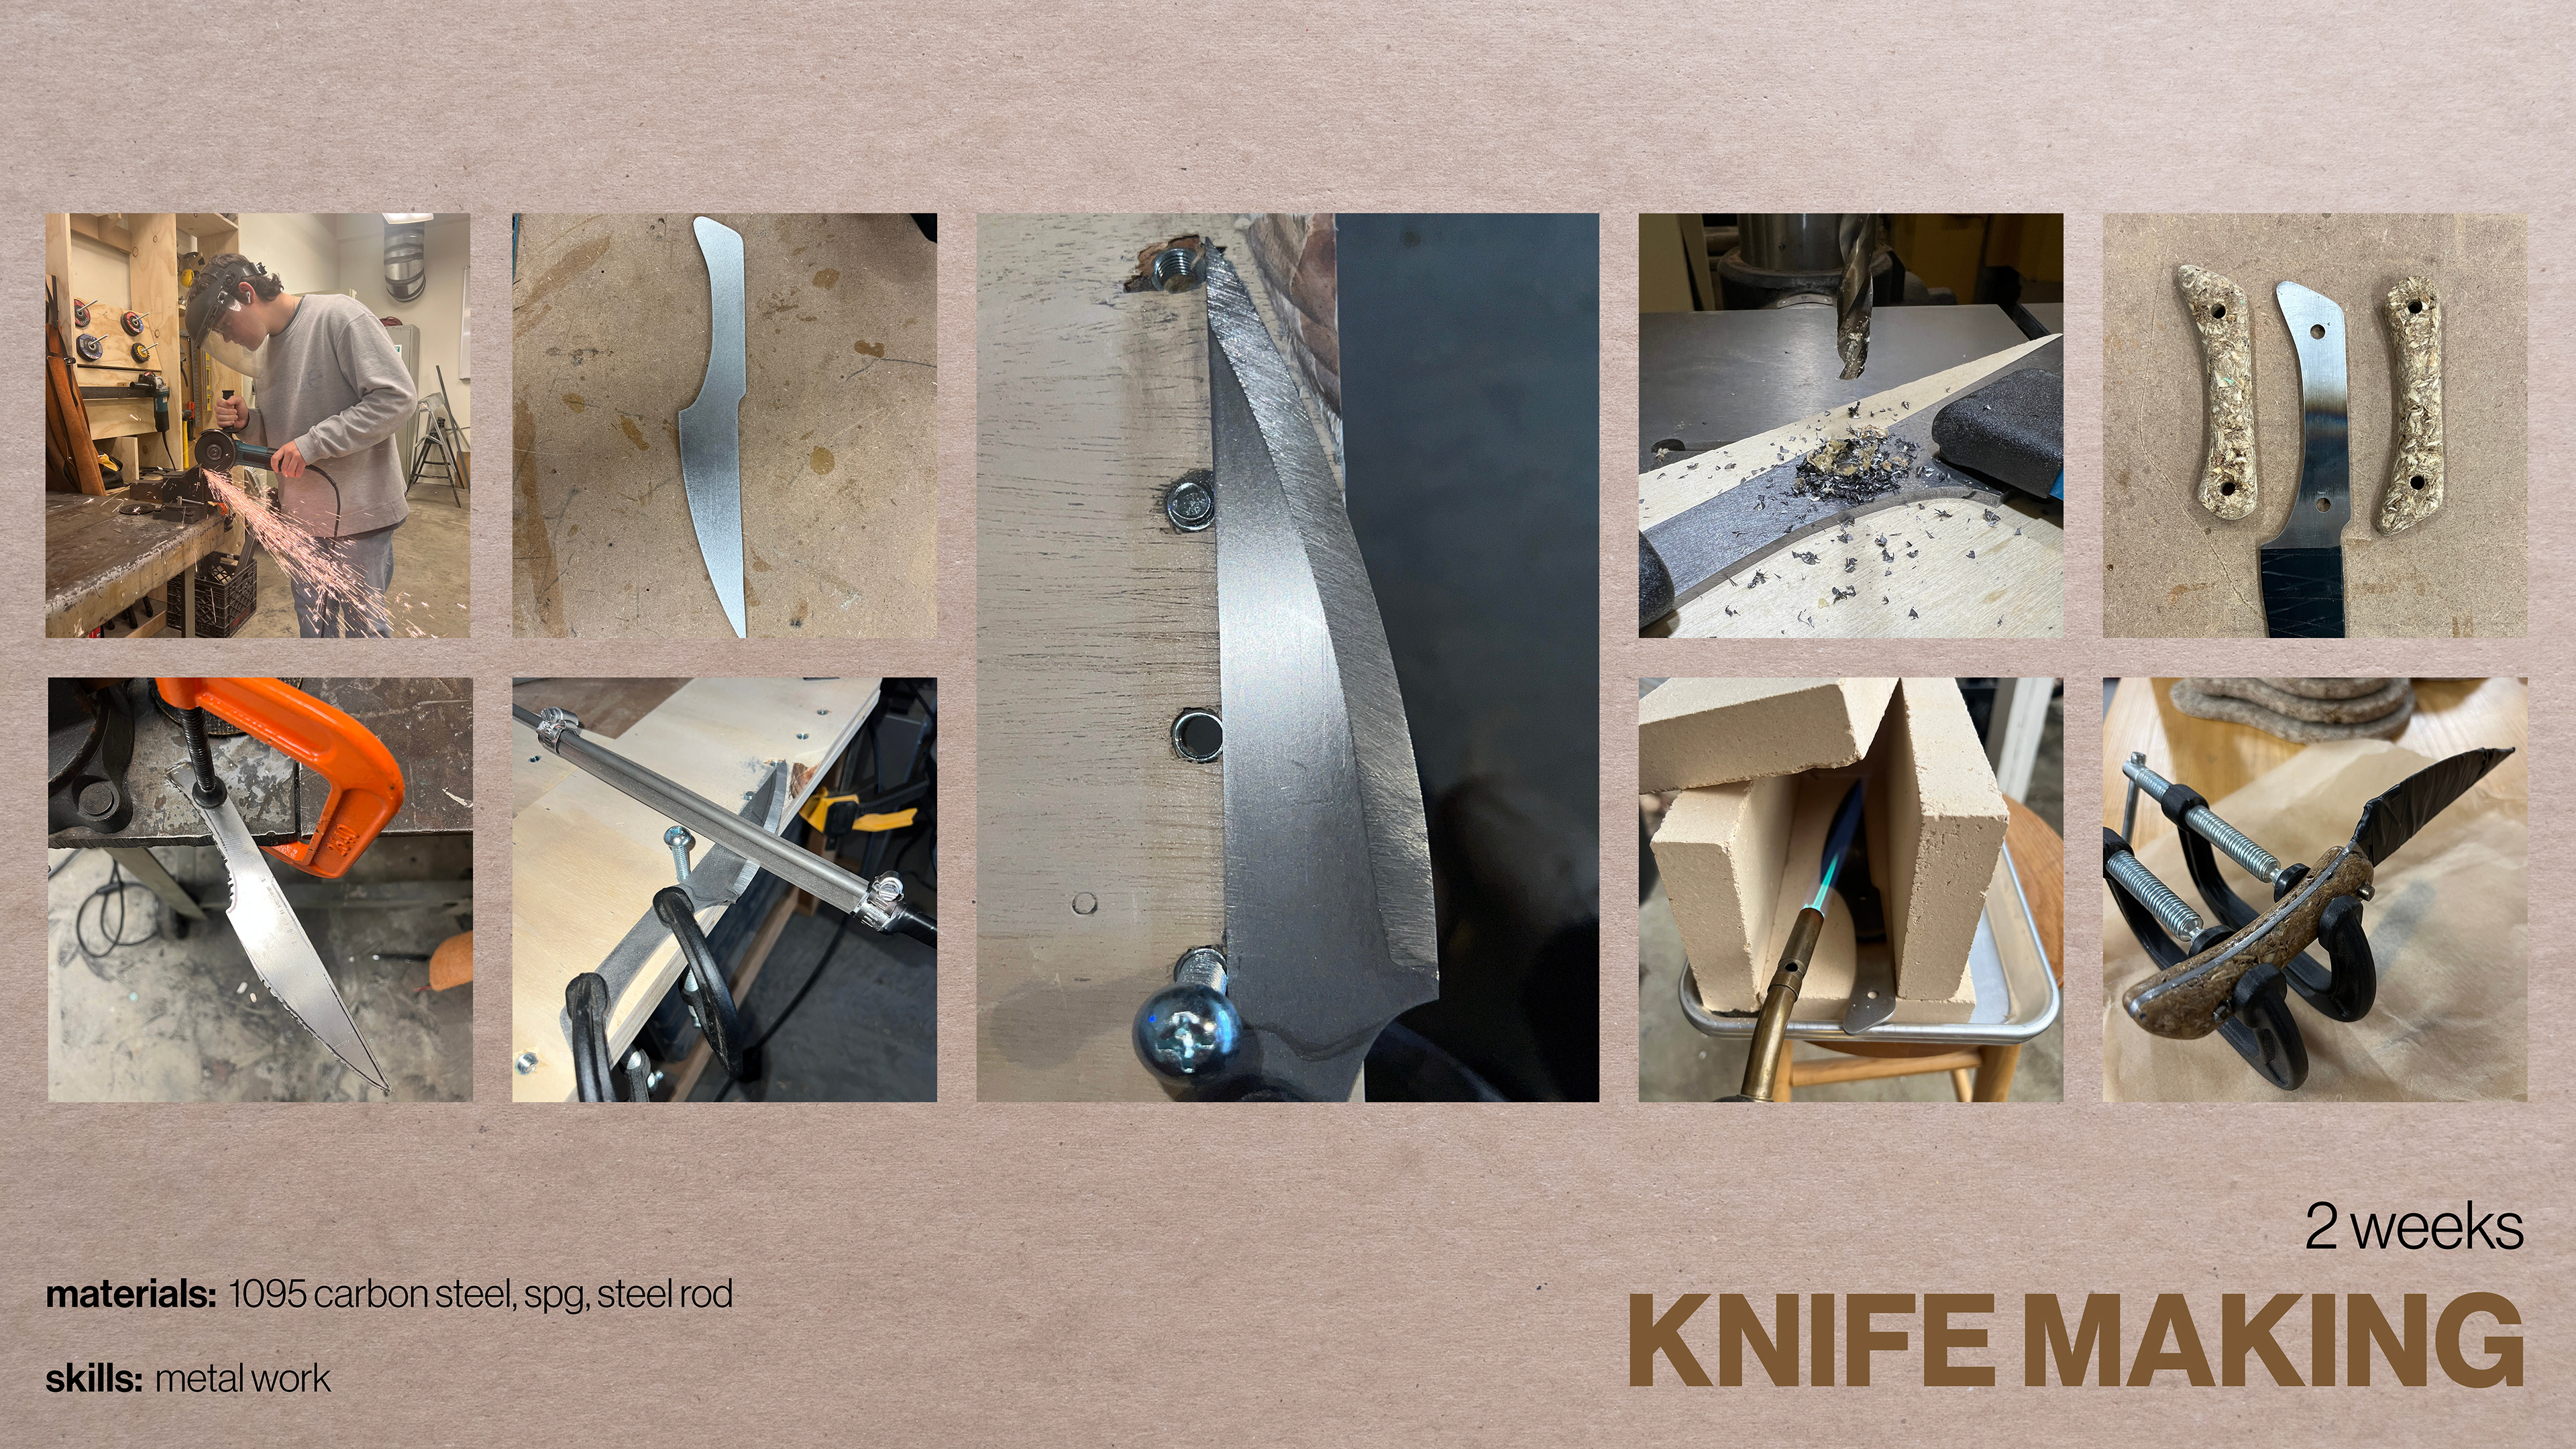
Knifemaking was a new challenge for me. I was originally advised by my professors to simply buy a premade knife blade in order to focus on the SPG handle, however, that's just no fun. Instead, I watched dozens of YouTube tutorials, bought a piece of flat stock 1095 carbon steel, and made my own. I designed the shape of the blade I wanted, cut it out with an angle grinder, and grinded the blade to shape. Lacking the proper tools to bevel the edge of the blade, I made my own beveling jig in order to file the bevel by hand. After drilling holes for the handle pins, I heat treated the blade, and finish sanded. The SPG handle was cut out on the bandsaw and shaped by hand before being glued onto the blade. One more round of sanding and a coat of food safe oil finished the SPG Knife.
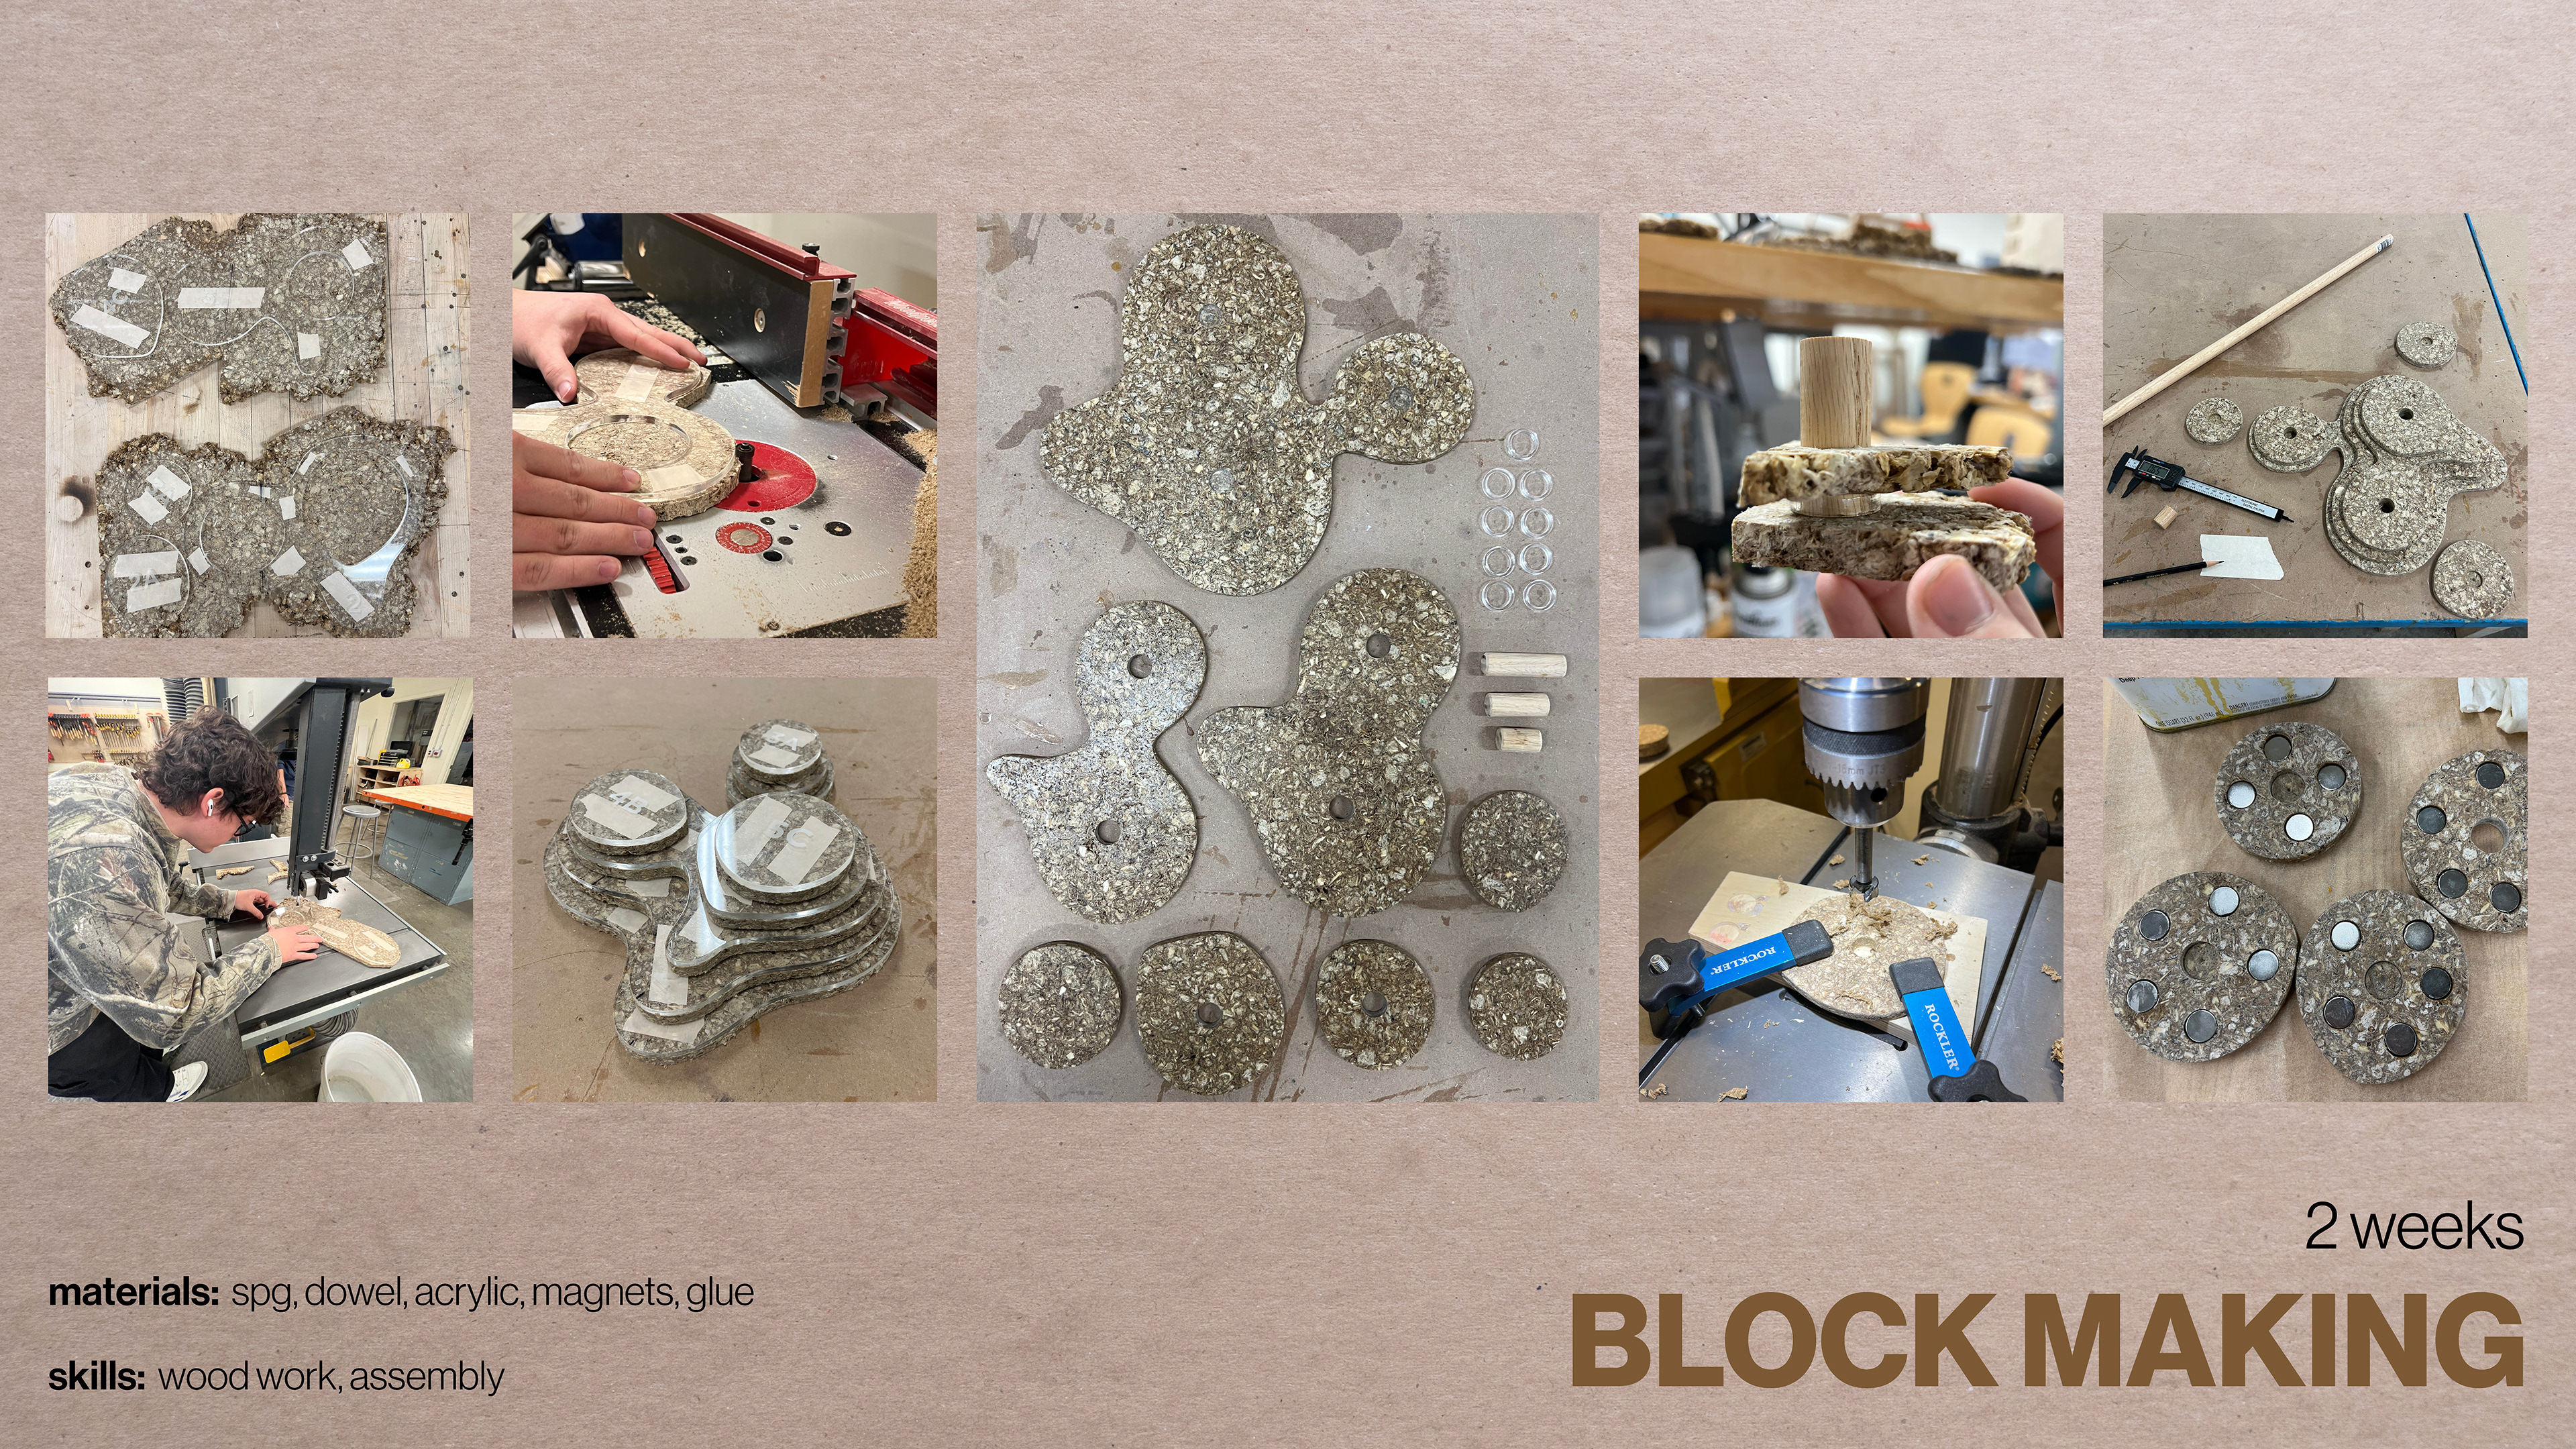
To make the knife block, I first started by laser cutting out my parametric "metaball" pattern templates out of upcycled acrylic. These templates provided me a guide to rough cut the SPG sheets to size before taking them to the router table to flush trim them to match the pattern perfectly. I then drilled holes for the dowels that would hold the pieces together, as well as pockets for the magnets that would secure the knife into the block. Lots of sanding later, I finished all of the pieces with a food safe oil before attaching them together with the dowels and upcycled acrylic spacers. When fully assembled, the knife block, like its parametric pattern design, has limitless options for knife placement, as the knife can be magnetized anywhere on the block.